...
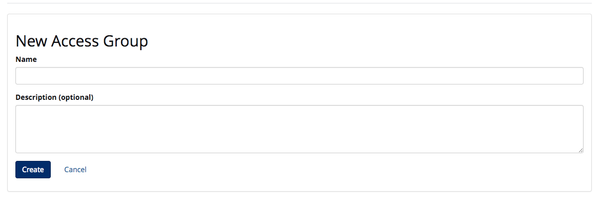
- Click the 'create access group' button. You then have the ability to name the Access Group and add a short description.
 Tip! An access group name is typically a location (Penn) or a Physician's name (Dr. Brown)
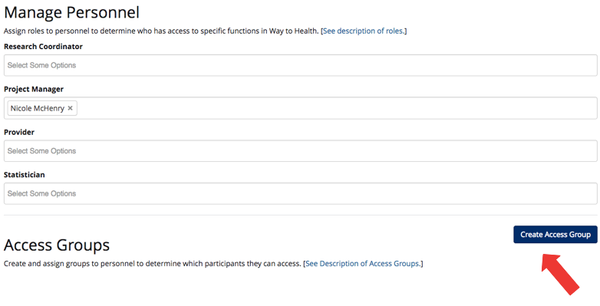
- Repeat #1 for all new access groups
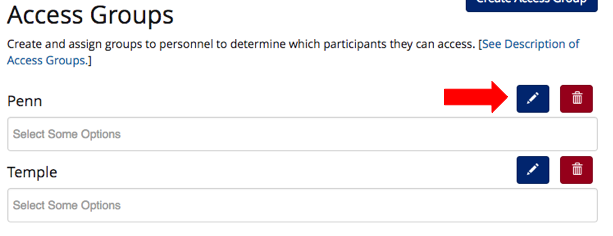
- Access group name and description can be edited once saved by clicking the pencil icon, or deleted by clicking the trashcan icon.
Assign users to access group(s)
- A user can be assigned to only 1 access group or assigned to multiple access groups, and multiple providers can be assigned to one access group.

Assign participants to an access group via the profile or in enrollment
...
- Navigate to the participant profile, then select the access group(s) to assign the participant to. Users can also assign participants to an access group in the profile, BUT they can only assign participants to access groups to which they are assigned.
- For example, Dan Smith would only be able to add a participant to the Penn and/or Temple access groups. The Jefferson access group would not be visible to him.

- For example, Dan Smith would only be able to add a participant to the Penn and/or Temple access groups. The Jefferson access group would not be visible to him.
Enrollment survey:
- To assign the participant to an access group in enrollment, this must be built in as a feedback consequence on a question in a survey or office visit survey (screening, demographic, access group assignment office visit survey, etc.)
- Go to the enrollment section of Manage Study
- Click into the feedback of survey with the question that will be used to assign the participants to the correct access group.

- Select the question that will be used to assign the participants to the correct access group.
- Set up the feedback consequence for each access group
...