...
Sending notifications within the dashboard
Instructions
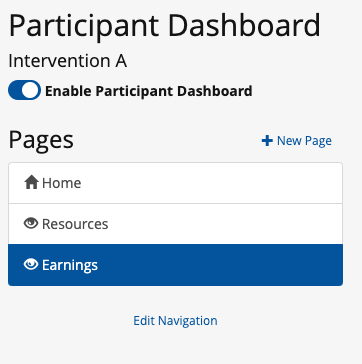
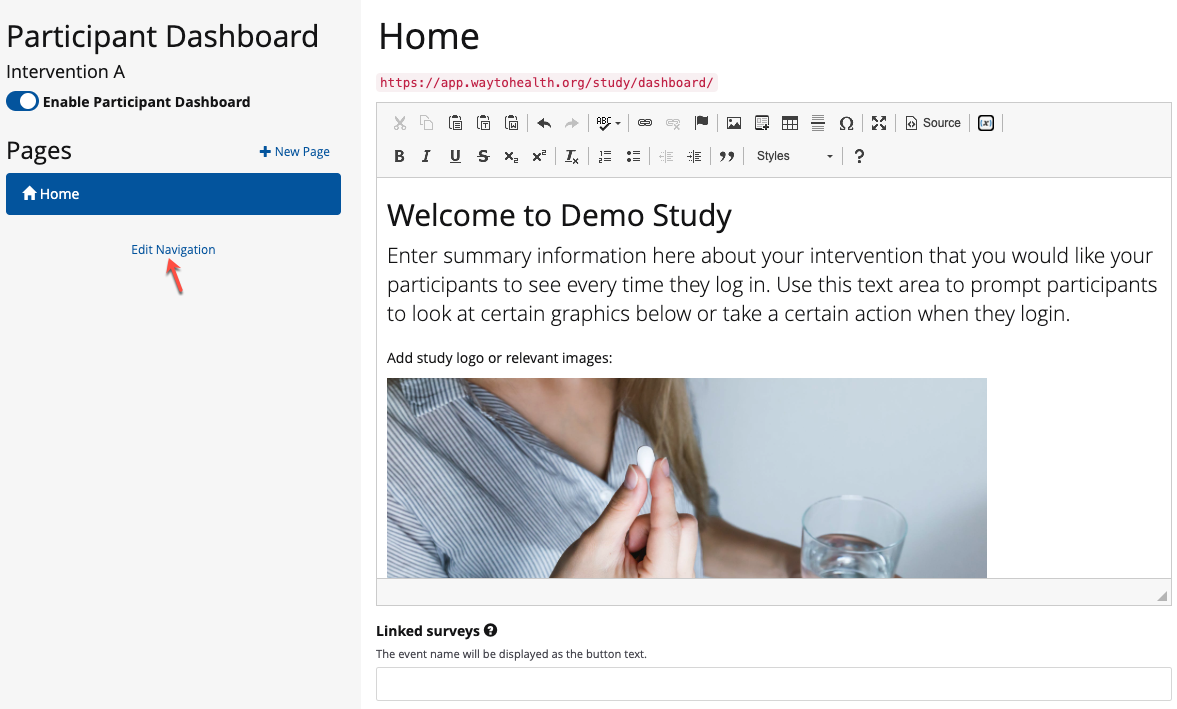
Turning on the participant dashboard
From the main menu, navigate to Manage Study > Study Arms. On the list of study arms, click on the “Configure Participant Dashboard” button.

Use the toggle on the left to enable the participant dashboard.
...
You have the flexibility to turn the participant dashboard on and off for each intervention arm. When the participant dashboard is turned off, started participants will see the “Enrollment Portal Display Text” which is configurable from Manage Study > Manage Enrollment > Setting tab.
...
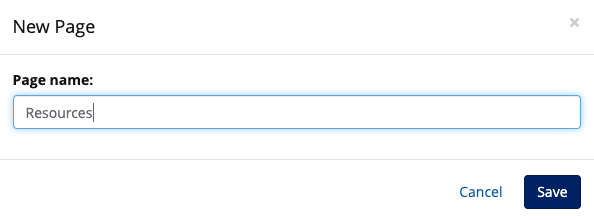
Adding new pages
Click “+ New Page” link.
Name your page in the modal and click “Save”.
...
Editing content
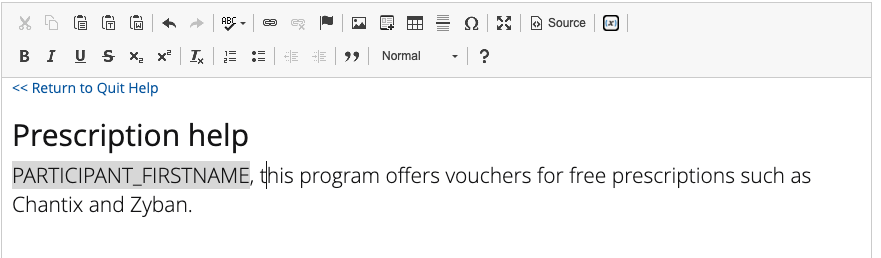
The content editor includes a rich text tool box that allows you to create and format content. This includes adding text, links, images, tables, bulleted lists, etc.
...
You may publish or discard changes any time you are editing content. Unpublished pages will display with a red dot in the navigation as well as the red error message above the “Publish” button (see example above). Unpublished pages only exist locally, so if you go to access the editor on a different computer without publishing, those edits will not display.
...
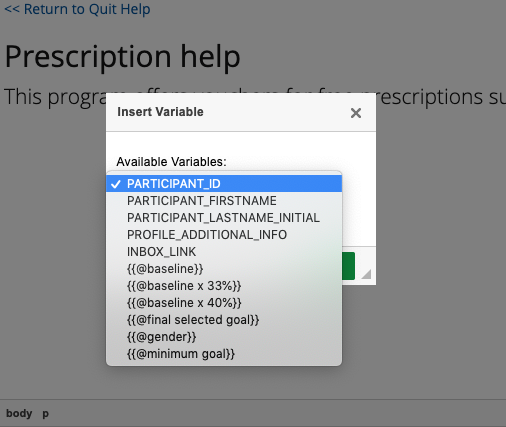
Inserting variables
To make the participant dashboard more personalized, you can make use of global variables in Way to Health.
To insert a variable, click the [x] icon in the toolbox.

Select the variable from the list and click “Ok”. Only study-wide and variables specific to that arm will display.
Once inserted, you will see the variable highlighted in gray in the content editor.
...
Editing navigation
By default, all newly added pages will be included in the main navigation. Pages that are visible in the main navigation will display with an open eye icon.
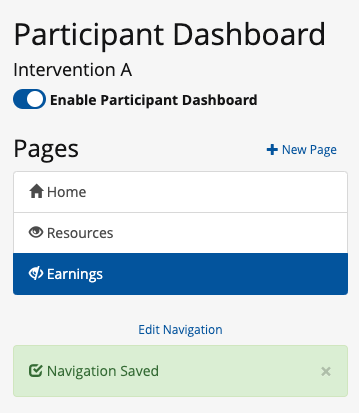
Click “Edit Navigation”.
You can change reorder pages in the main navigation using drag and drop.
You can remove them from the navigation completely with the toggle.
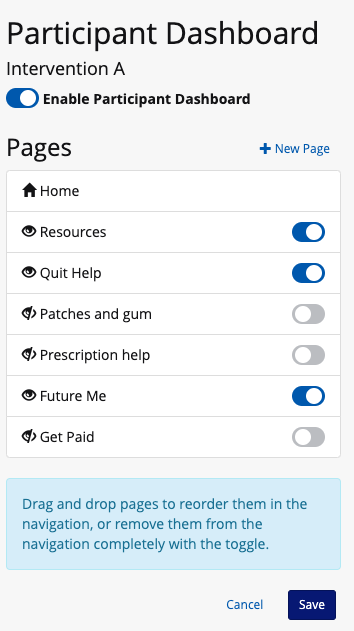
Pages not visible in the navigation will have a line through the eye icon indicating it is no longer visible there.
Click “Save” when you have finished editing.
...
Linking surveys
Participants can access and complete surveys directly through the participant dashboard.
...
| Info |
|---|
You are directly linking the survey to the participant portal page. Each survey may have multiple events tied to it. For example, an order form that is available every 30 days, or a baseline and end of study survey that is administered twice. The button will display with the name of the event, rather than the name of the survey to allow for customization based on timing. Be sure to use friendly verbiage in your event name. |
...
Previewing content
To preview content, you will need to create a test participant. Once you have created your test participant, you will need to login as the test participant to access the dashboard.
...
| Info |
|---|
If you need to make changes, you can keep your test participant dashboard window open. That way once you publish a change, you can refresh that window to preview the update. |
...
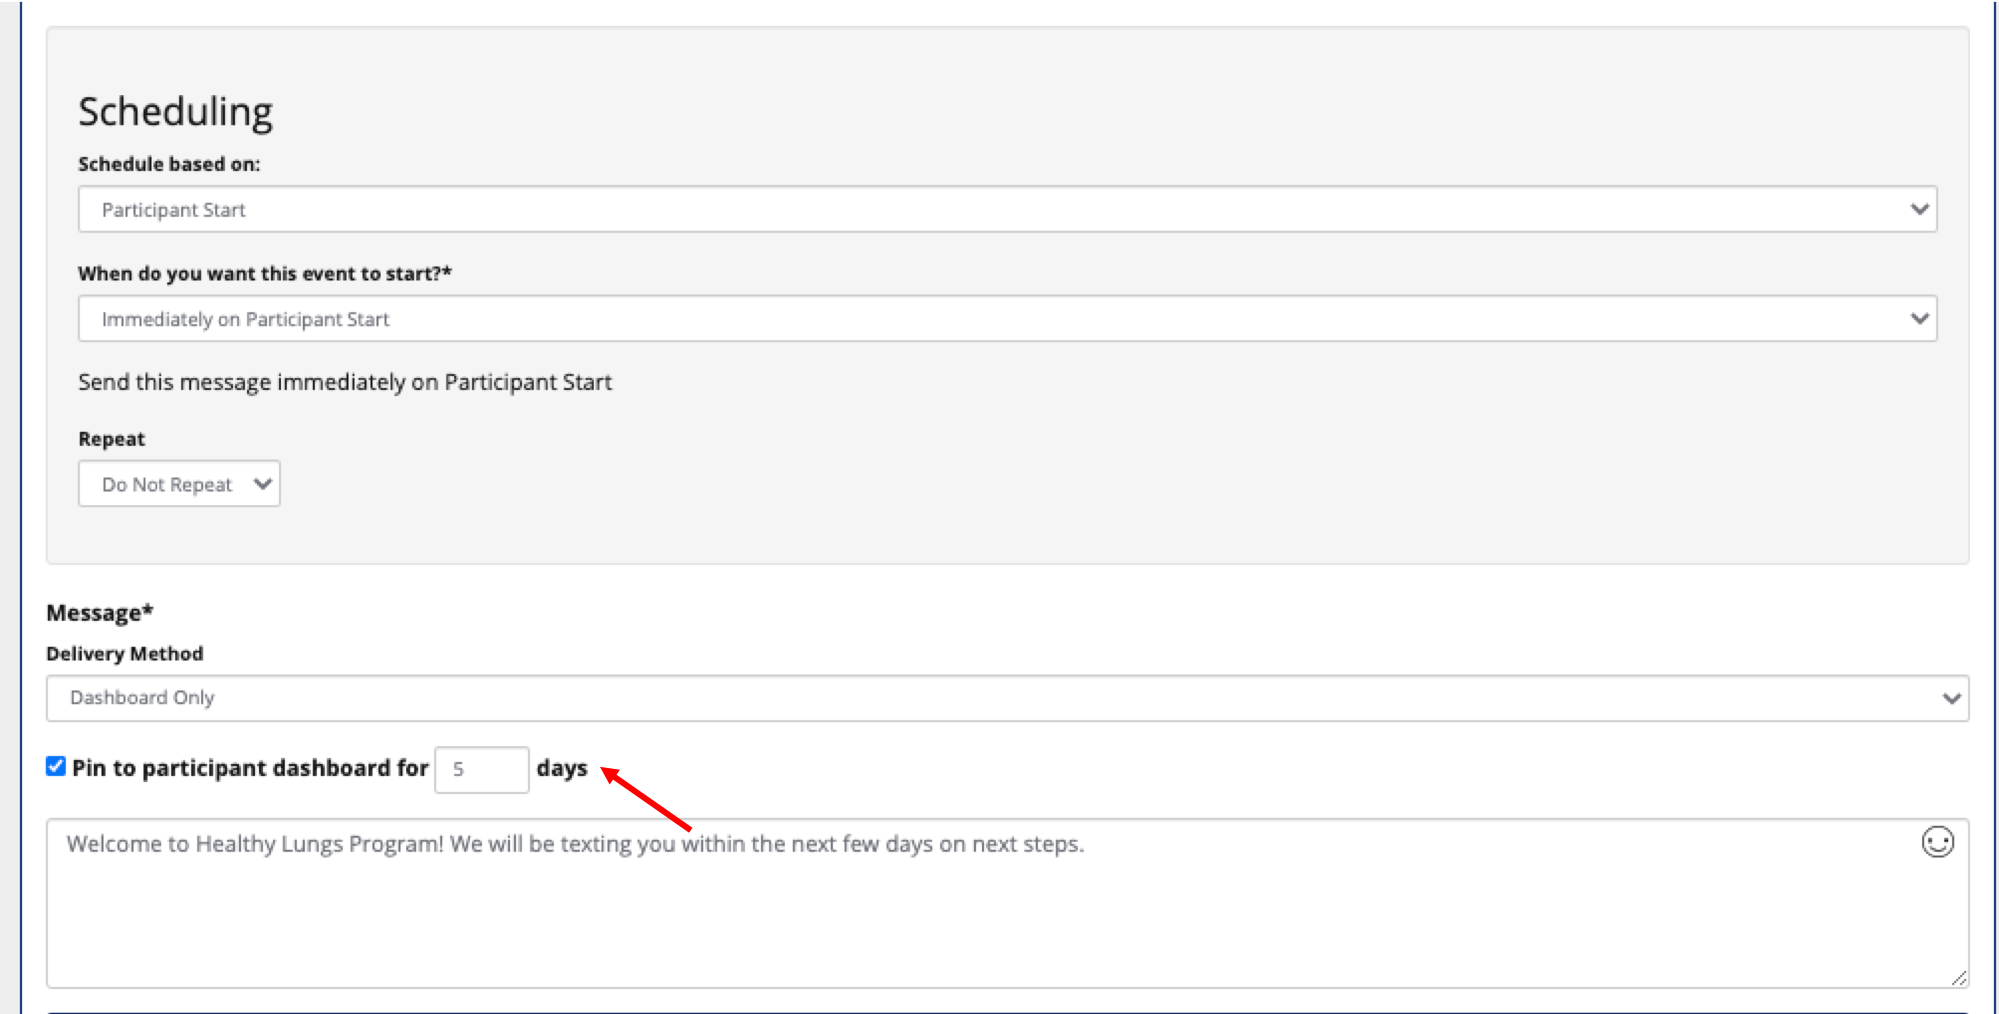
Sending notifications within the dashboard
You can send notifications to participants that will appear in their dashboard when they login.
On the message you want to send to the dashboard, select “Dashboard only” in the dropdown for Delivery Method.

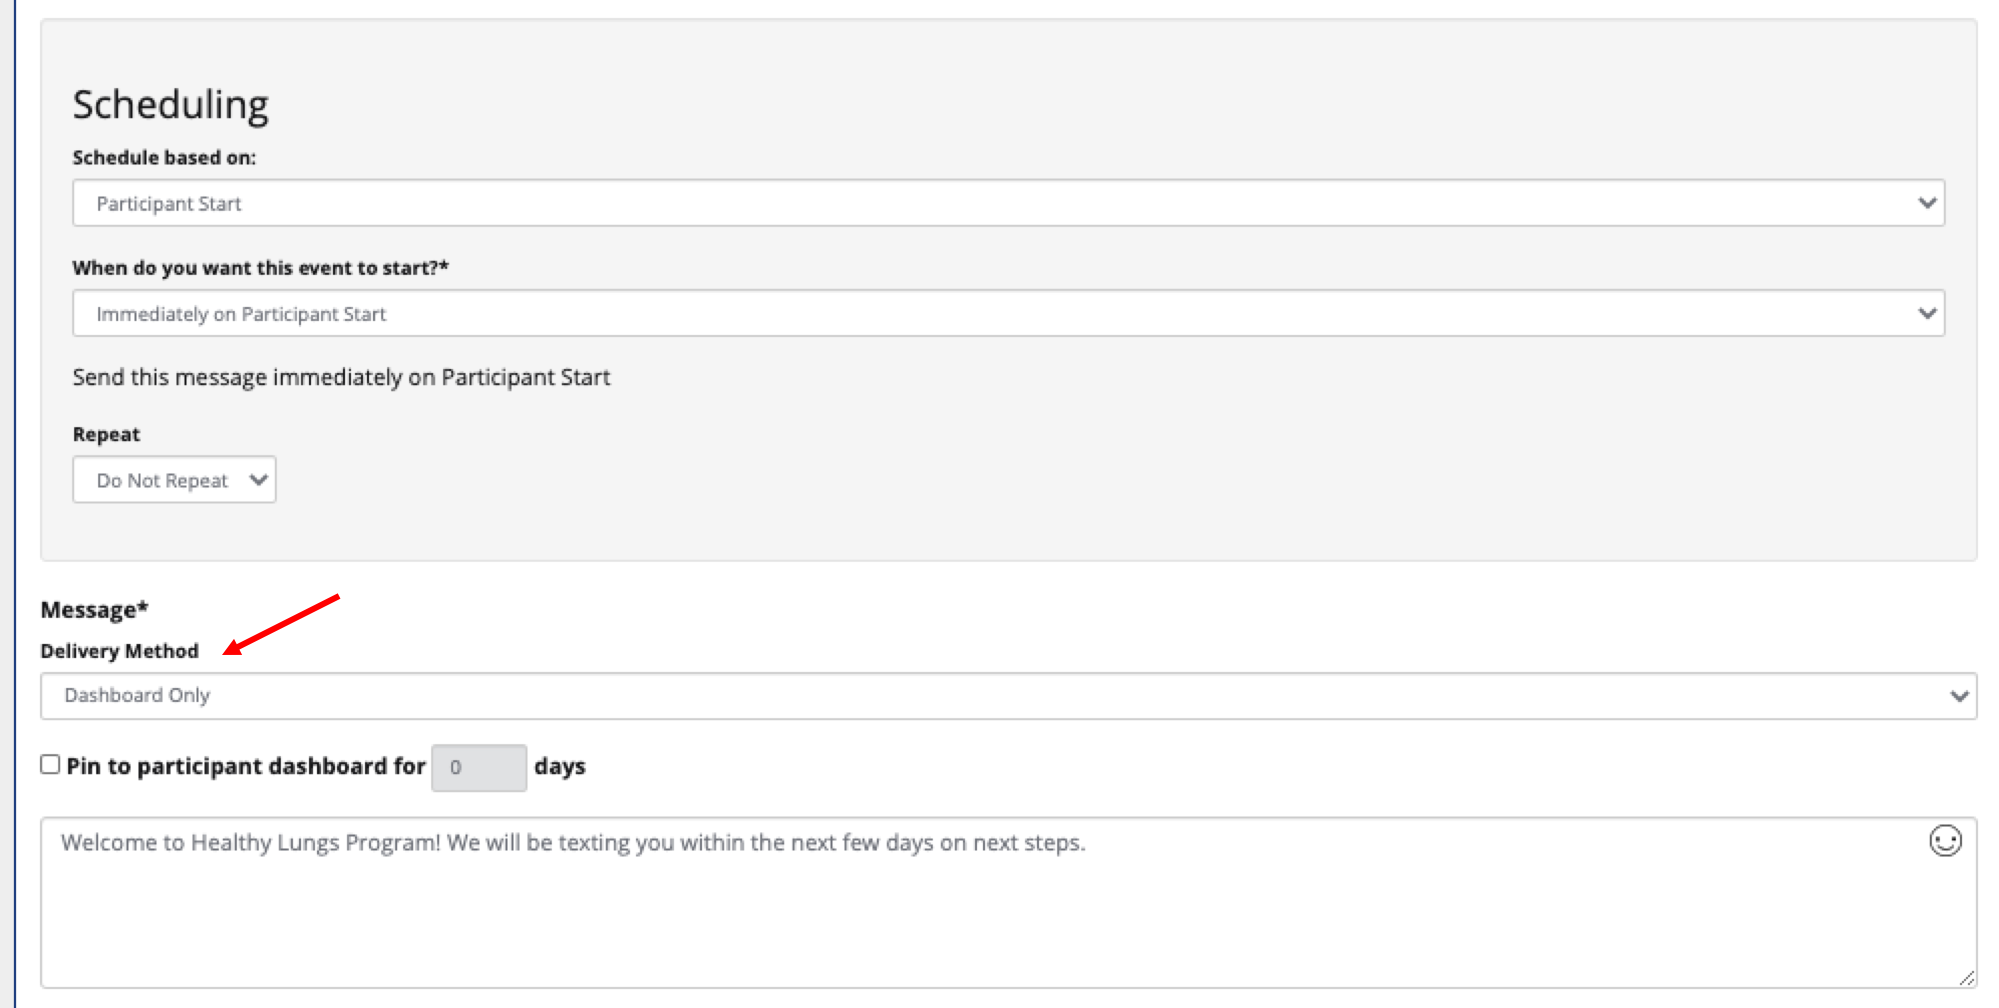
To have the notification pinned to participants' dashboard for an extended period of time, select the “Pin to participant dashboard” checkbox. Select the number of days you want the notification to be pinned.

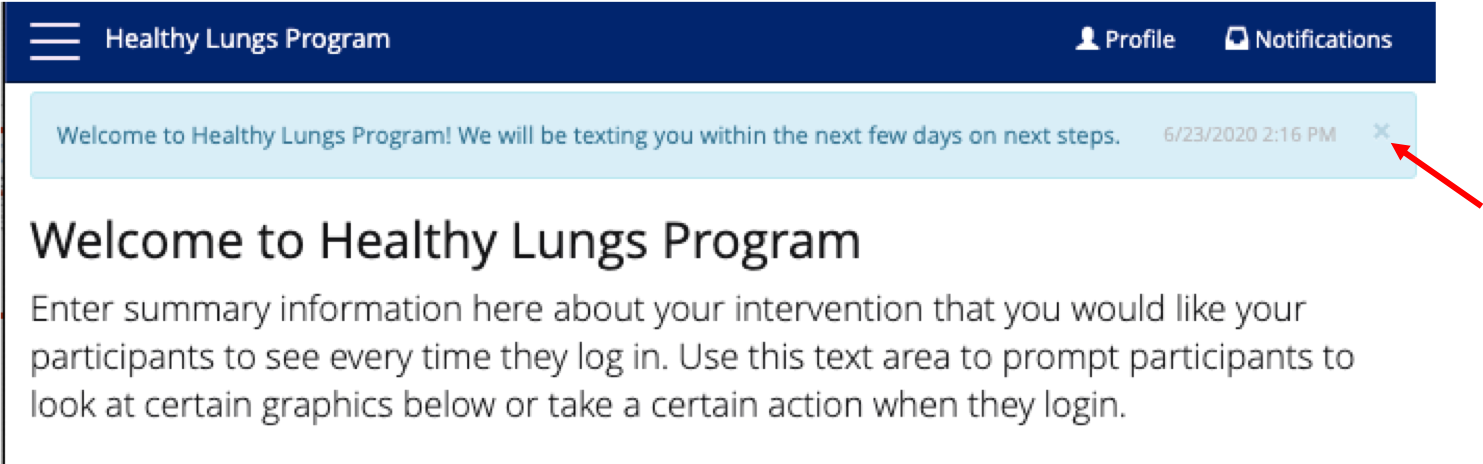
From the participant’s view, the notification will appear as a blue banner at the top of the dashboard when they sign in. The notification includes the date and time it was sent. They can close out the notification by selecting the “x” in the far right corner.
Related articles
| Filter by label (Content by label) | ||||||||||||||||||
|---|---|---|---|---|---|---|---|---|---|---|---|---|---|---|---|---|---|---|
|
...