...
- Build, preview, and test surveys directly inside of WTH
- Include PHI-related questions in your surveys, because both the survey and the responses are securing securely stored directly within in Way to health directlyHealth
- Allow multiple users on the same study to seamlessly add new and edit existing surveys
- Protect against accidental survey deletion and ensure data integrity - once a participant has completed a survey, a the questions on that survey cannot be deleted or edited in any way. Instead WTH will automatically create a new version for you!
- Create new versions copies of the survey with the 'Duplicate Survey' survey button
How can I build a new survey?
- Navigate to the 'Data Sources' drop-down under Manage Study.
- Click 'New Data Source'.
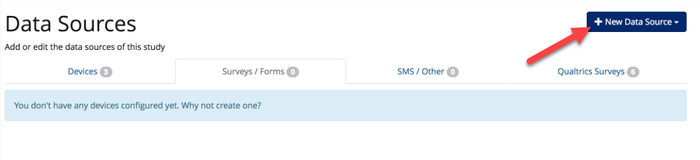
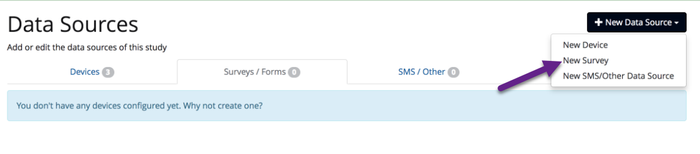
- Select 'New Survey'.
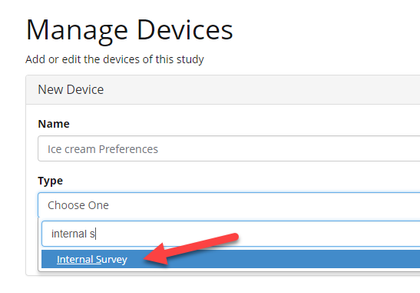
- Name your survey and select 'Internal Survey' as the type.
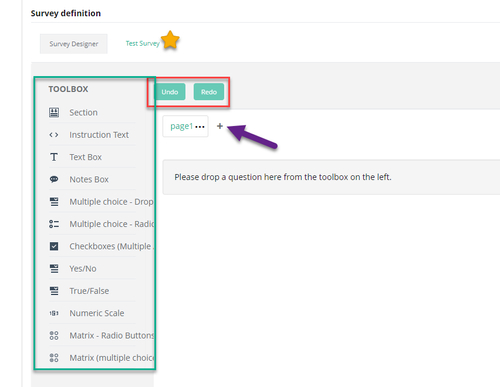
- Once the internal survey is selected, the survey builder will appear.
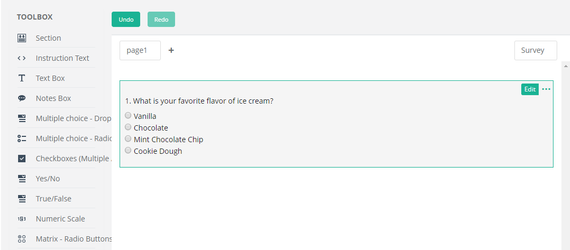
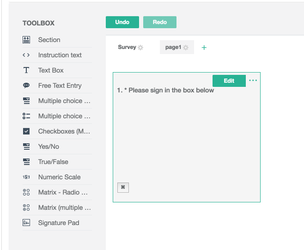
- Toolbox - this is where you select your question type. All that you have to do is click on the new question type and it will be added to your survey.
- Undo and Redo - accidentally delete a question? you can revert back with these buttons.
- Add a new page - includes page breaks in your survey
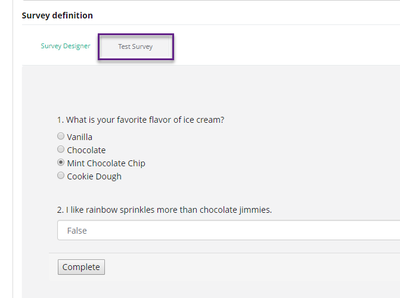
- Test Survey - preview survey questions and answers and practice completing a survey like a real participant
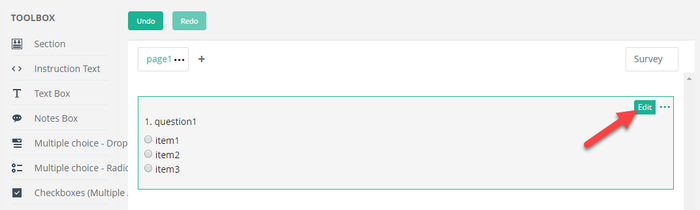
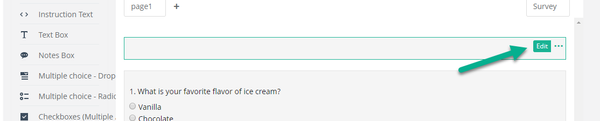
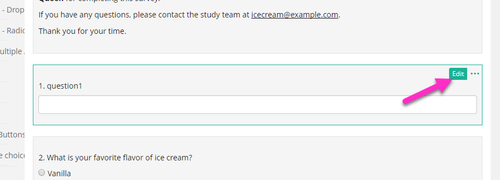
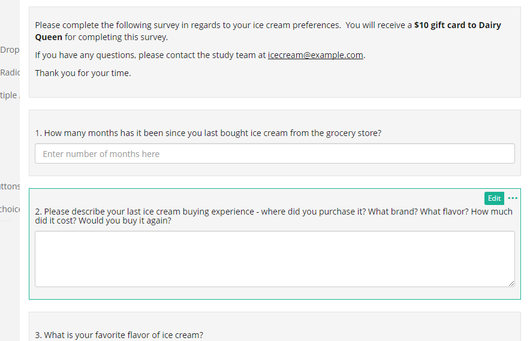
- Click to add a new question. Once the question is added to the survey, click the 'Edit' button to edit the question name and choices.
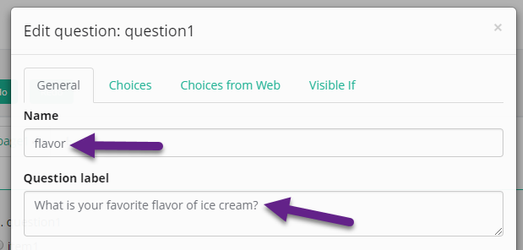
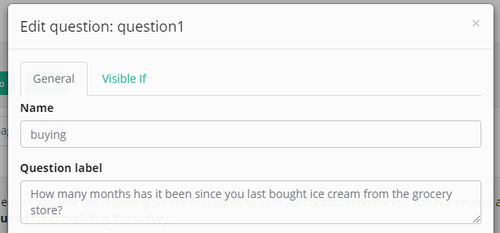
- The edit screen will appear. From here you can update the 'Question ID' and 'Question Text'.
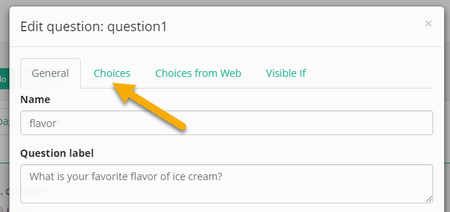
- You can either stop there and move on to the 'Choices' tab, or add more customization.
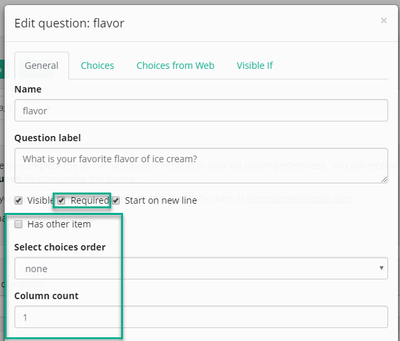
- 'Add Option for Other' - include an 'other' choice selection
- Select the choices order that the response options display - ascending, descending or random.
 Leave the default of none? The choices will display as indicated on the choices tab.
- Column count - reformats the display of the choices
- Required- participant cannot complete the survey without answering this question. This is great for screening eligbility surveys!
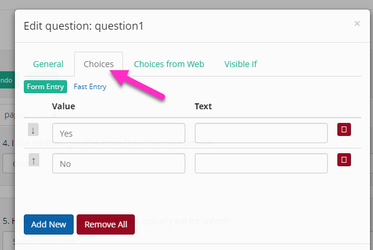
- Click the 'Choices' tab to add your question's response options.
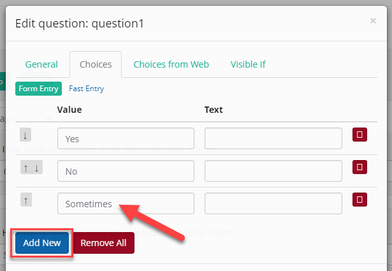
- You can now add your choices! This includes adding new choices and removing outdated options.
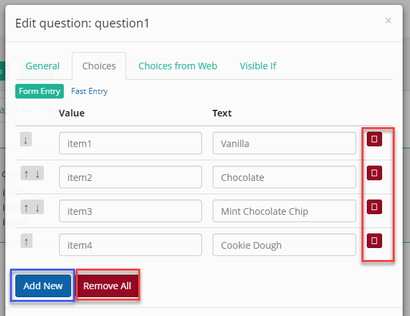
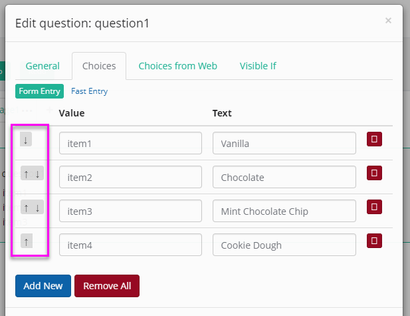
- You can also manually reorder the choices. Just use the arrows on the left.
- Once you have updated the choices, click 'Ok' to save. Your new question will be added to the survey.
- To add additional questions, repeat this process by clicking on a new question type on the left.
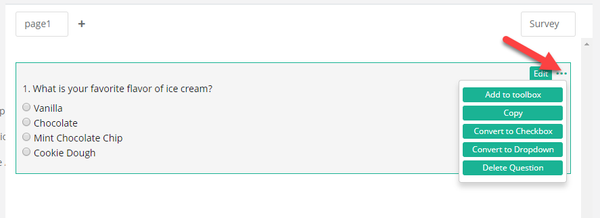
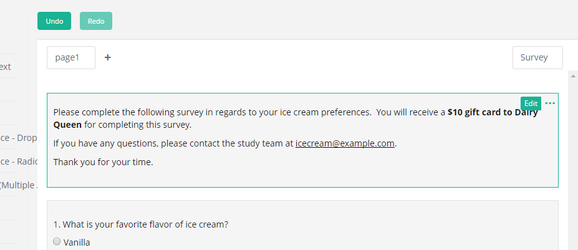
- You also have the ability to copy, delete, or edit the question by clicking the 3 dots ... on the upper right hand corner of the question.
- Want to reorder your questions? You can drag and drop the questions to move them around. Simply click on the question and drag it into the order place.
- View the questions, choices and test the survey by going to the 'Test Survey' tab.
- Once you are done creating, editing, and testing your survey. Click 'Add'. The survey is now ready to be added to enrollment steps or arm events!
...
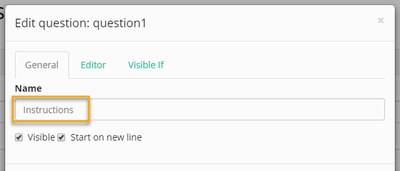
- Click the 'Edit' button.
- Inside the Edit screen, type the label for the question in the Question ID, e.g. Instructions.
- Navigate to the 'Editor' tab to add the instructional content. Once the content has been added, click the 'Add' button.
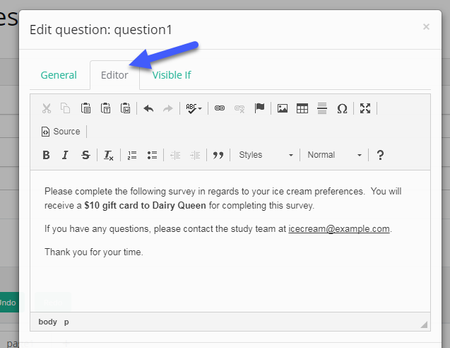
- Once you have completed editing the question, click 'Add'. The instruction text question will now display in your survey overview.
Text Box- best question type for a short, free text prompted response.
- Click the 'Edit' button.
- Inside the Edit screen, type the label for the question in the Question ID and 'Question Text'.
 Tip! You can add content validation. For this example, we want to make sure that the participant enters in a number. To do this, select 'Input Type' then 'Number'.
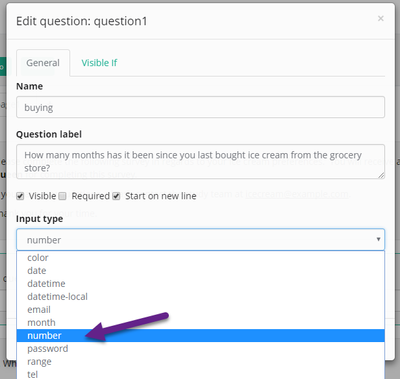
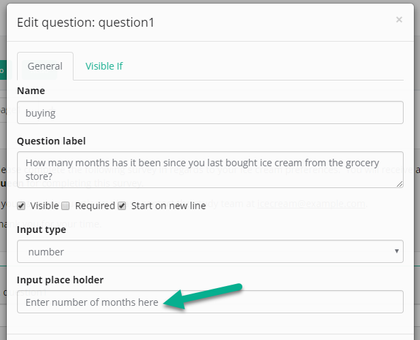
- You can also prompt the correct response from the participant with help text in the free text box by adding content to the 'Input place holder' box.
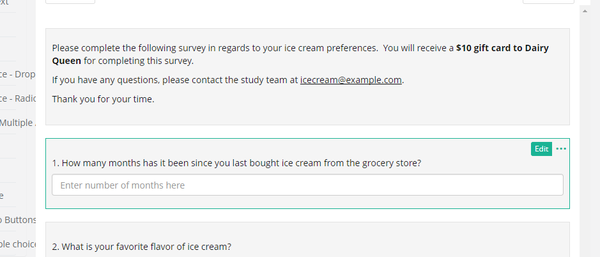
- Once you have completed editing the question, click 'Add'. The text box question will now display in your survey overview.
Free Text Entry- best question type for a longer, free text prompted response.
- Free text entry question set up is identical to Text Box question.
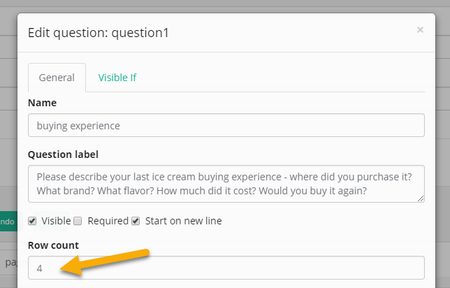
- You can edit the number of lines in the text box. This may help facilitate a shorter or longer response! To do this, update the value in the 'Row Count' box.
- Once you have completed editing the question, click 'Add'. The free text entry question will now display in your survey overview.
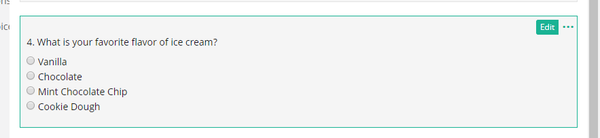
Multiple Choice - Radio Buttons- multiple choice question type that allows for one answer and defaults to hiding choices.
See detailed example and set up from Section I!
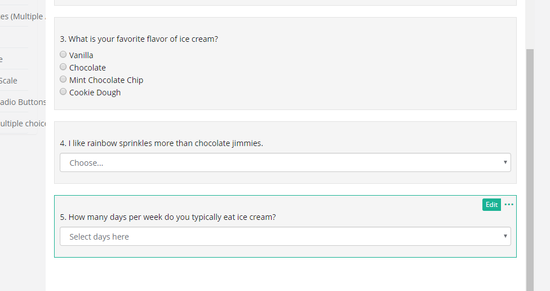
Multiple Choice - Drop down- multiple choice question type that allows for one answer and defaults to displaying choices.
- Drop down MC set up is identical to Radio Button MC.
- You can also add a label to the drop down by clicking 'Drop down label'.

- Once you have completed editing the question, click 'Add'. The MC - drop down question will now display in your survey overview.
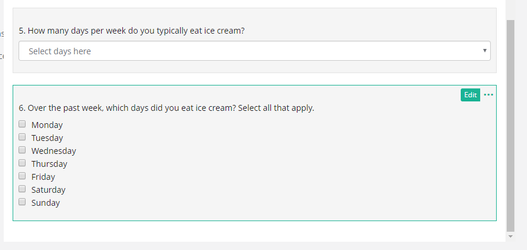
Checkboxes (Multiple Answer) - multiple choice question type that allows for more than one answer and defaults to displaying choices.
- Checkboxes question set up is identical to Radio Button MC.

- Once you have completed editing the question, click 'Add'. The Checkboxes question will now display in your survey overview.
Yes/No - question type that prompts for yes and no responses.
- Yes/No question set up is identical to Radio Button MC.
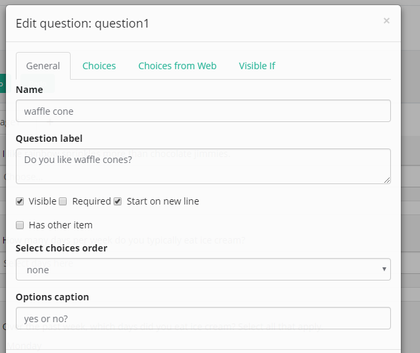
- To view and edit the choices, click the 'Choices' tab.
- Add an additional option for 'Sometimes' by clicking 'Add New'.
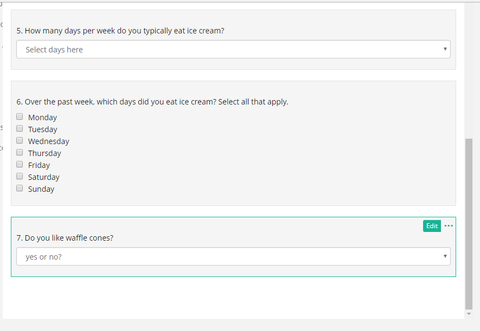
- Once you have completed editing the question, click 'Add'. The Yes/No question will now display in your survey overview.
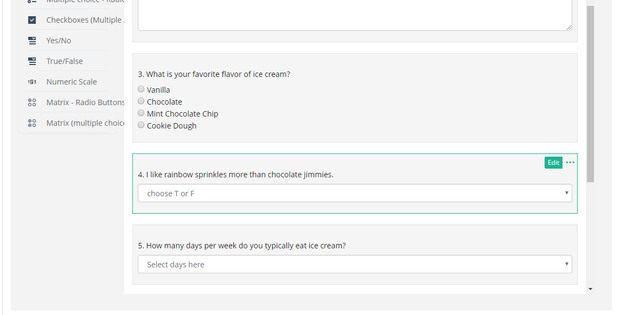
True/False - question type that prompts for true and false responses.
- True/False question set up is identical to Yes/No.

- To view and edit the choices, click the 'Choices' tab.
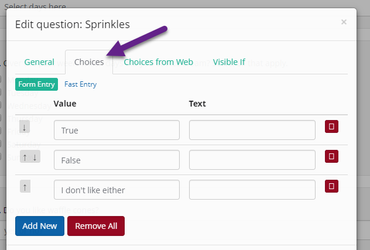
- Add an additional option for 'I don't like either' by clicking 'Add New'.
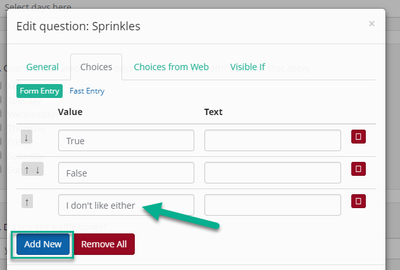
- Once you have completed editing the question, click 'Add'. The Yes/No question will now display in your survey overview.
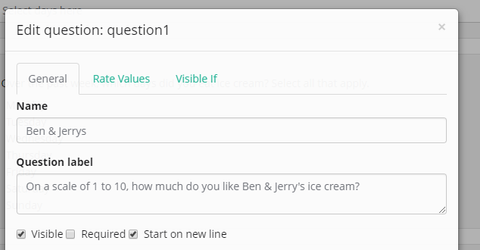
Numeric Scale - question type to administer Likert scale questions and gauge preferences.
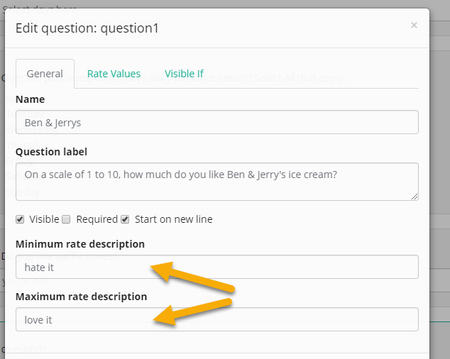
- Inside the Edit screen, type the label for the question in the Question ID and 'Question Text'.
- In the Minimum rate description box, add a description of what the lowest value represents. Then in the Maximum rate description box, add a description of what the highest value represents.
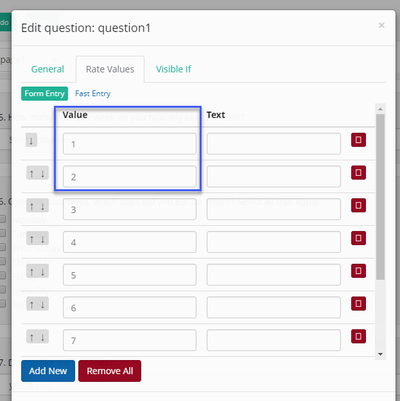
- Navigate to the Rate Values tab to add the appropriate scale values. In this example, we need 10 choices. You can do this by,
- Entering the values into the 'Value' text box
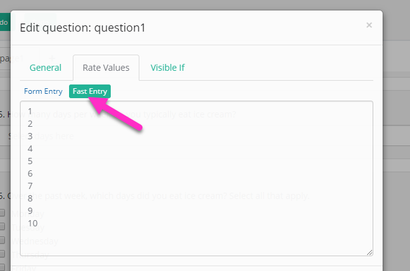
- Entering the values on separate lines in the 'Fast Entry' tab. This will save you time!
- Entering the values into the 'Value' text box
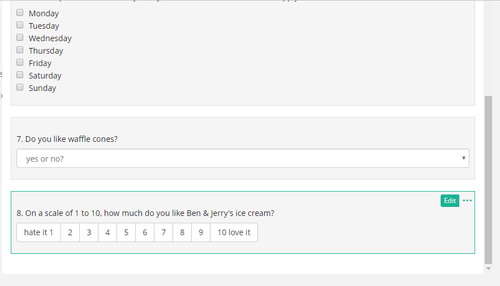
- Once you have completed editing the question, click 'Add'. The Numeric Scale question will now display in your survey overview.
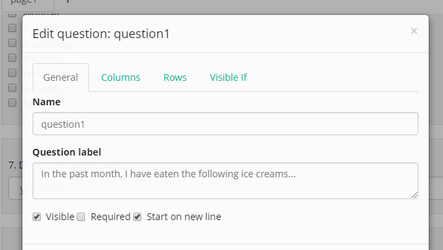
Matrix - Radio Buttons and Matrix (multiple choice) - ask participants multiple questions of the same question type.
- Inside the Edit screen, type the label for the question in the Question ID and 'Question Text'.
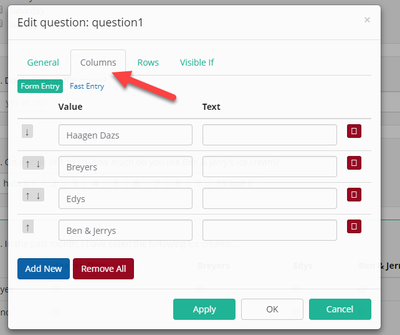
- Navigate to the Columns tab to add new and update the columns.
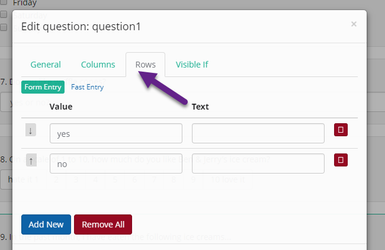
- Navigate to the Rows tab to add new and update the rows.
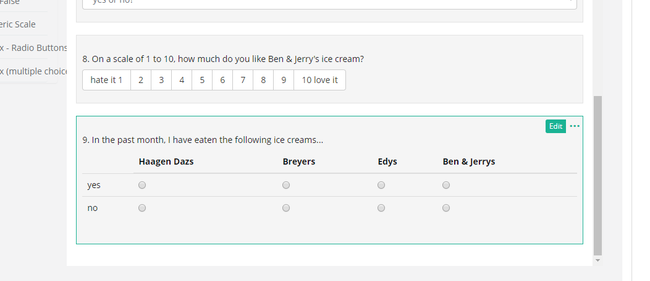
- Once you have completed editing the question, click 'Add'. The Matrix - Radio Buttons question will now display in your survey overview.
Setting Up Skip Logic
...
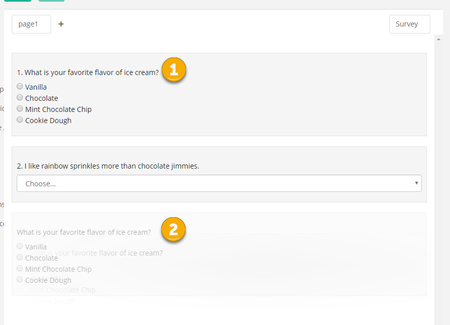
- At the top of the Survey editor, click + next to the current page.
- Add a question.
- Navigate to the Display Logic tab.
- Using a very basic formula, you can define when the question you are editing gets displayed. Simply enter the question's code in curly brackets, then use an operator such as the 'equals' sign followed by the valid response code in single quotes.
For example, {eat3_1} = 'True'
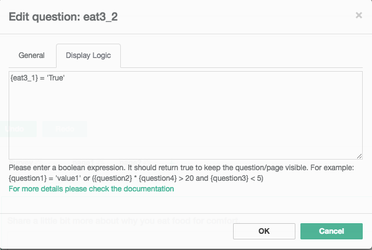
You can also use AND/OR in your phrase such as {eat3} = 'Disagree' or {eat3} = 'Stronglydisagree'
...
We now offer signature pads that are available for use. You can add a signature block in a survey or consent form that a participant can sign using a computer mouse or their finger on a touch screen device!
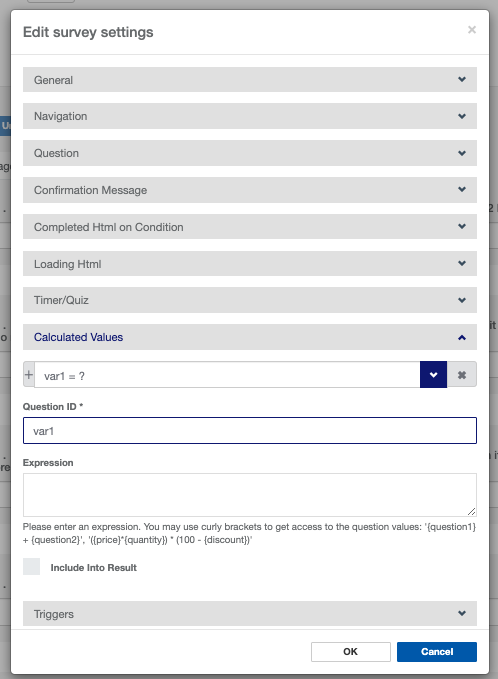
You also have the ability to calculate values in surveys and conversations. Calculating values in surveys will allow you “score” or aggregate specific responses as needed. Under survey settings at the top of the edit page, you can create a variable from within the survey by calculating values using an expression. On the survey settings page, navigate to the calculated values section and name the variable un the Question ID field, and enter the expression to calculate the score in the field below. Calculating values in surveys will allow you “score” or aggregate specific responses as needed. This would be helpful in many clinical scoring tools, like the PHQ-9, in which a total number based on participant responses is relevant to their care or outcomes.
...
Now that I am an expert on question types and survey building, what's the next step?
...
For adding the new survey to enrollment, see the Survey section of Old Enrollment Process.
For adding the new survey to a study arm, see the 'Administer a Survey' Event page for adding this into an arm.
...