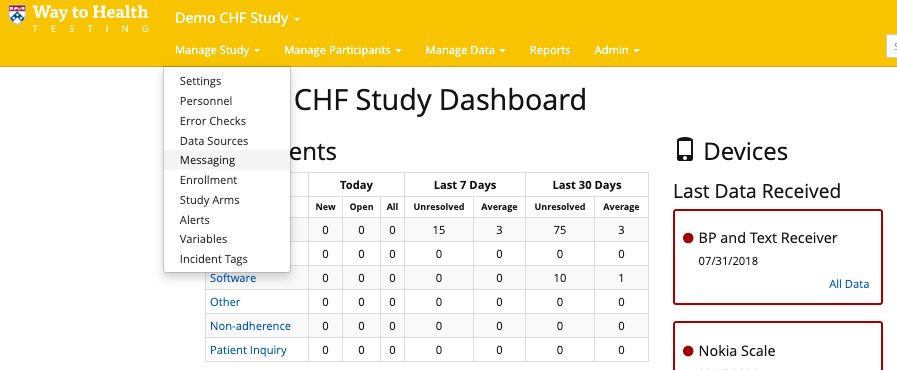
Navigate to Manage Study> Messaging in order to begin creating your participant conversations!

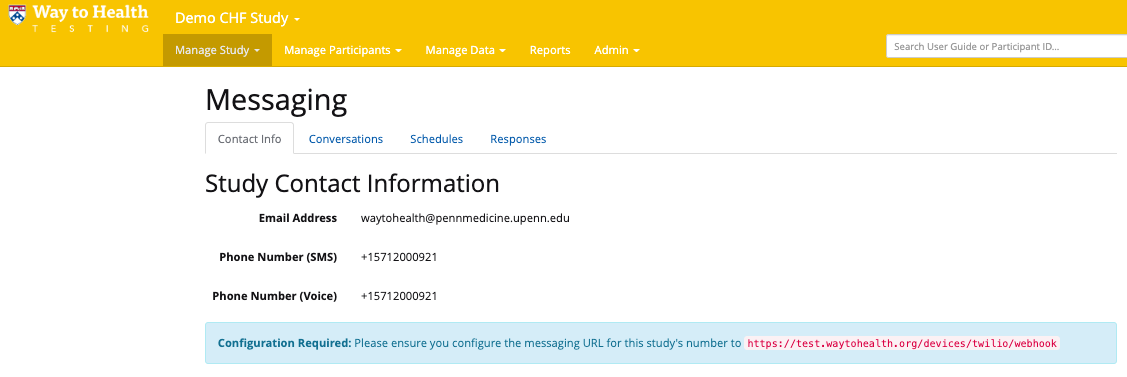
Here you will see 4 tabs. Click the Conversations tab!

In the top right corner, click the blue button that says "+ New Conversation." The conversation builder page will then appear. (As you can see, this is very similar to our survey builder)
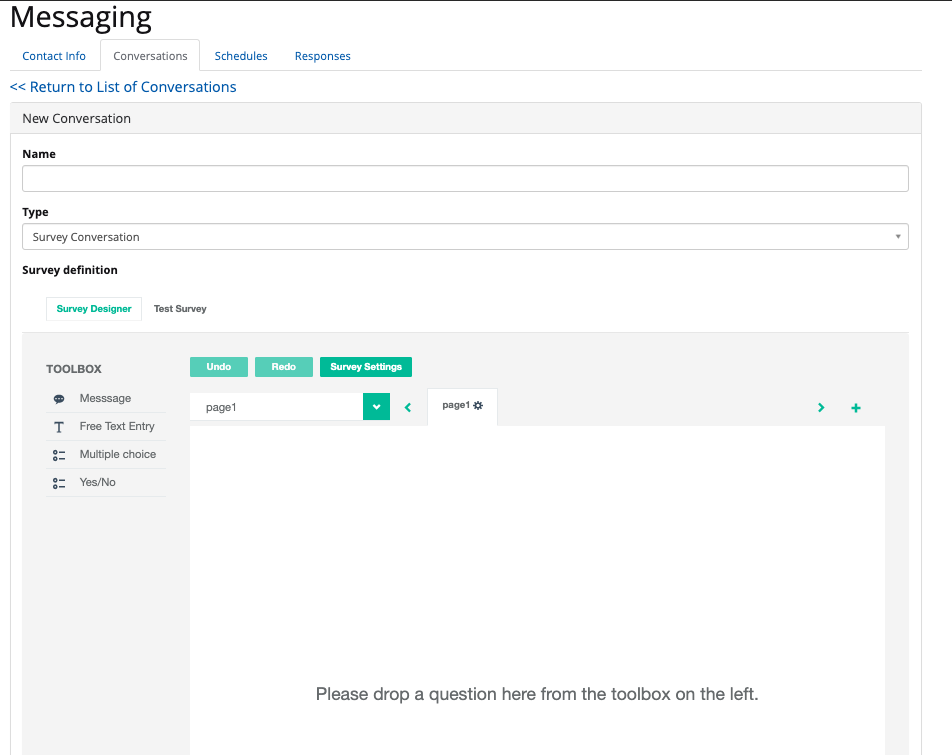
From here, you can build your text message conversation like a survey. Drag and drop your question types into the conversation builder.
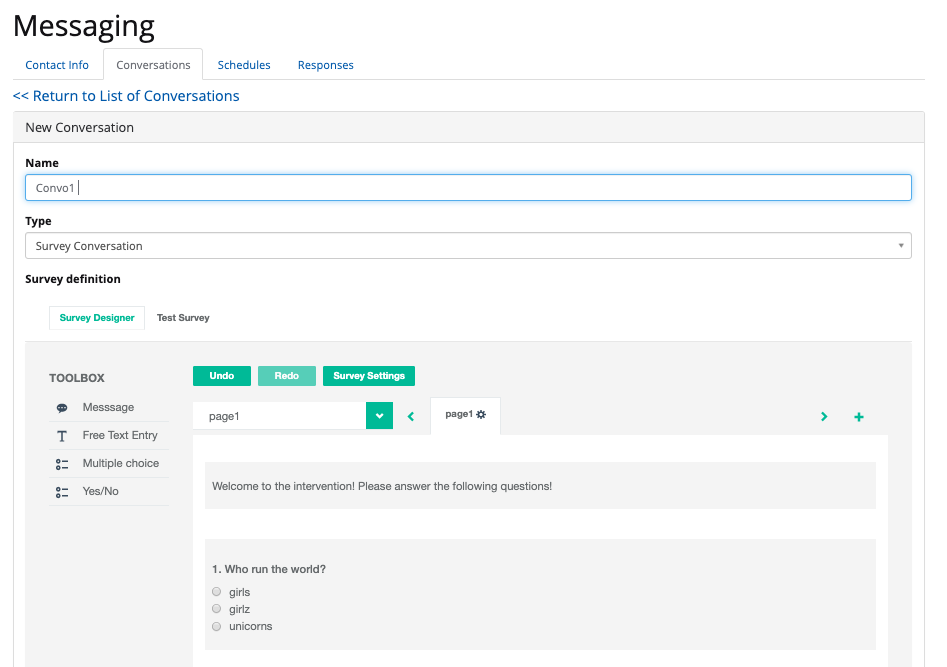
You have the ability to:
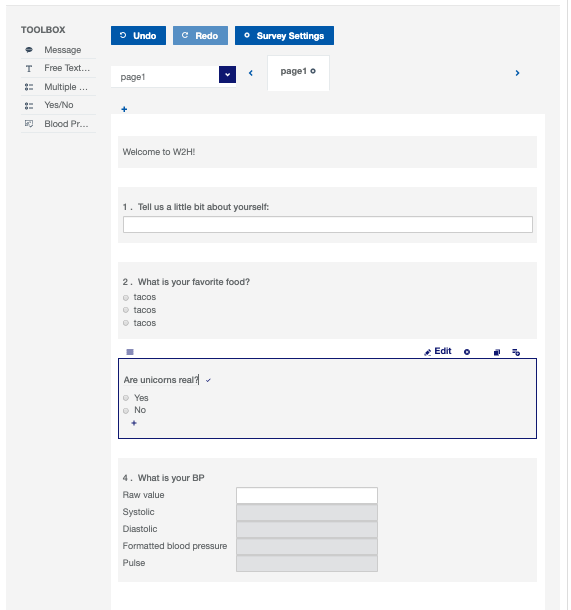
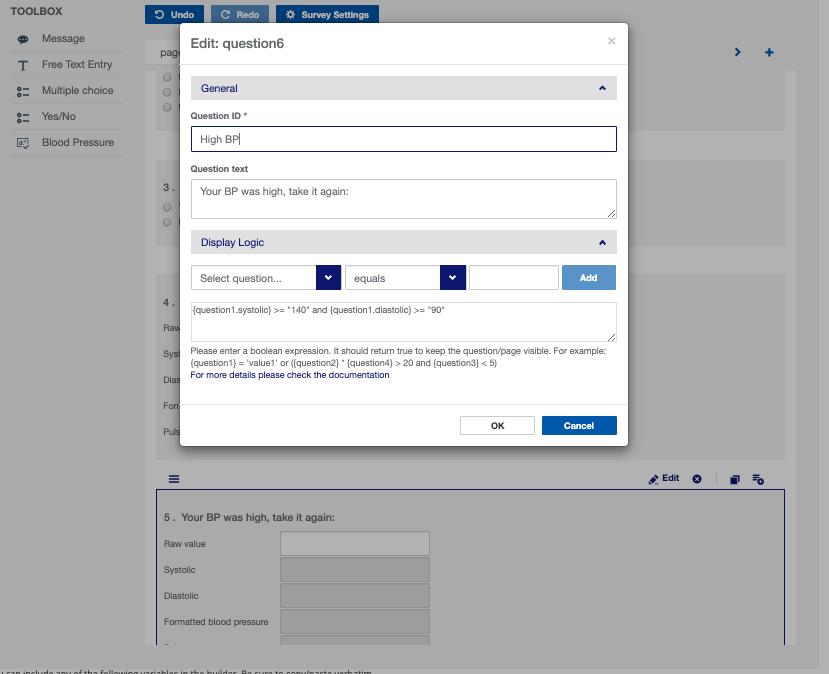
What is great about our BP questions is that based on different reported BP ranges, you can respond to participants differently. Using skip logic, you can say, for example, if this participants BP is over 140/90, then ask them to rest for five minutes and take their BP again:
The "Photo Request" question type will default the question to ask "Please send us your image." You can edit the question coding and text using the question editor.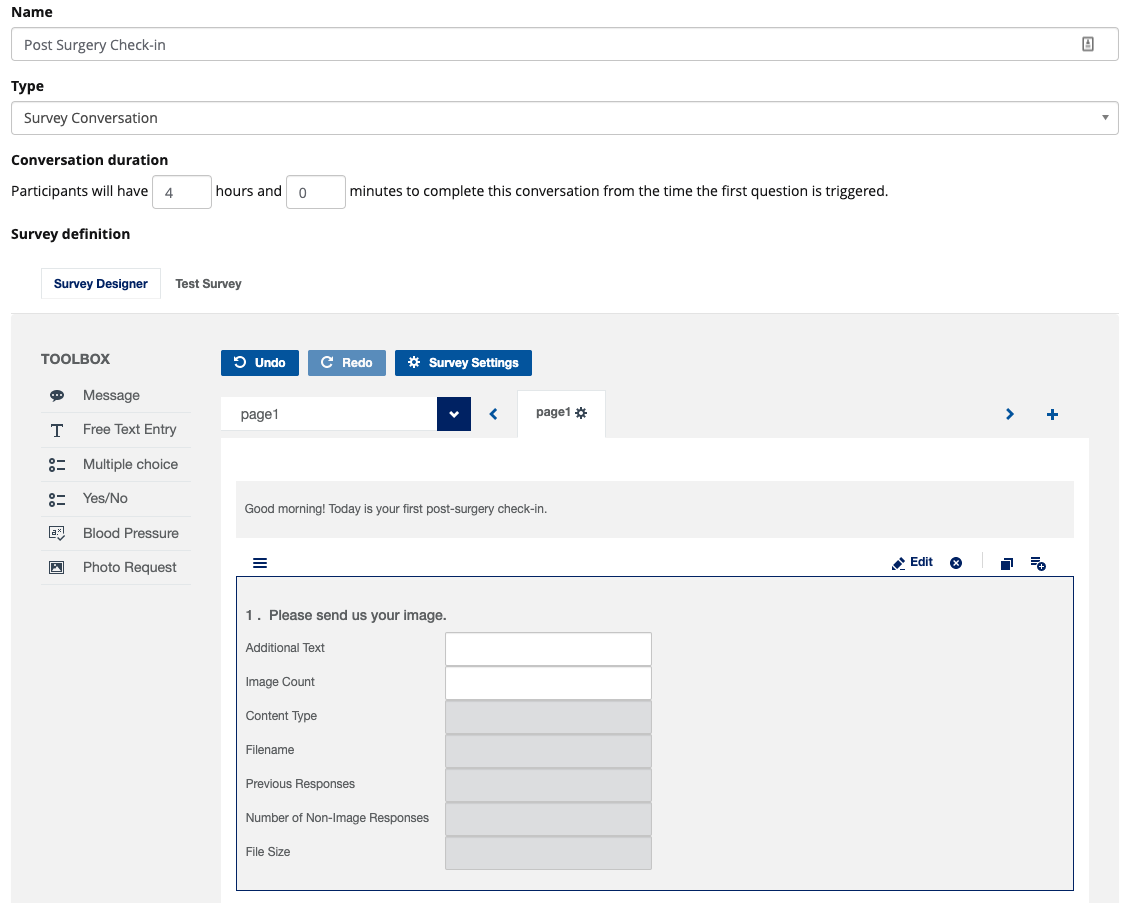
The question will also pull in other data associated with the image:
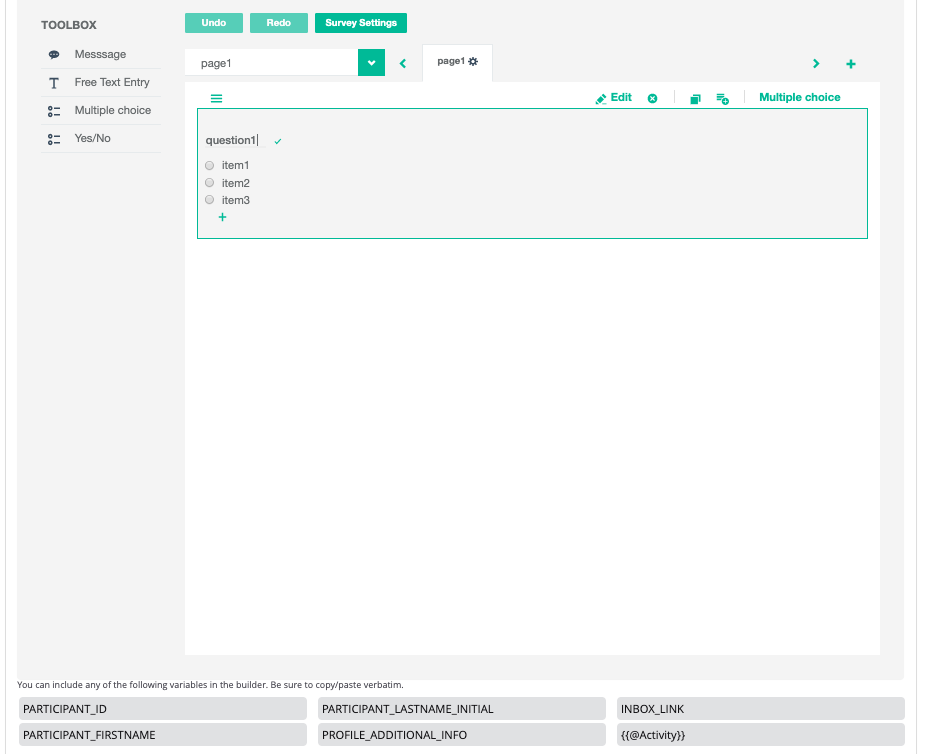
You can also use study-wide variables in conversations! Variables can be found at the bottom of the conversation builder.
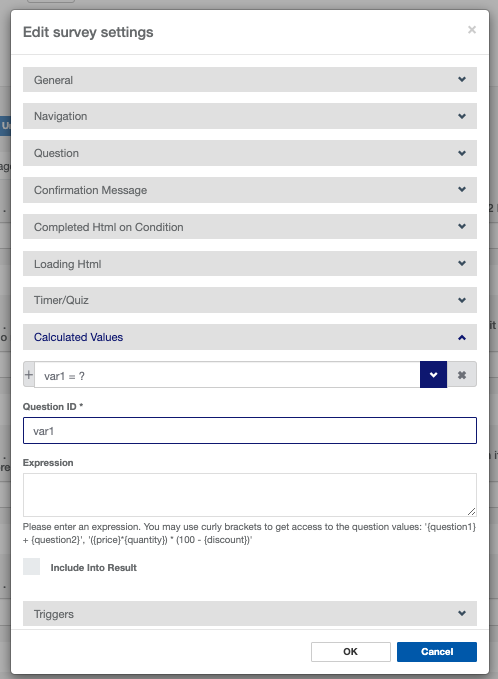
Under survey settings at the top of the edit page, you can create a variable from within the survey by calculating values using an expression. On the survey settings page, navigate to the calculated values section and name the variable un the Question ID field, and enter the expression to calculate the score in the field below. Calculating values in conversations will allow you “score” or aggregate specific responses as needed. This would be helpful in many clinical scoring tools, like the PHQ-9, in which a total number based on participant responses is relevant to their care or outcomes.
You can also set the conversation duration on this screen:
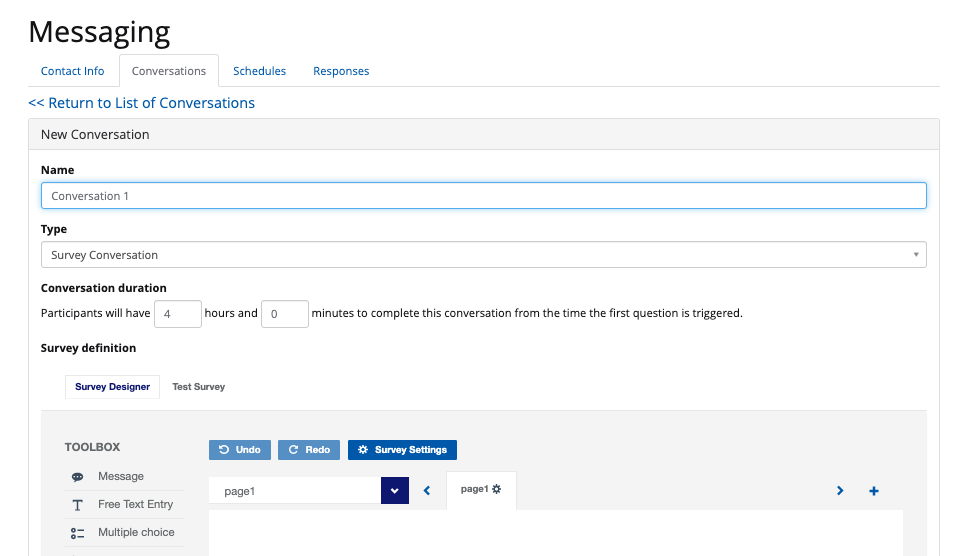
This is important because with the logic action "start a conversation" you can configure a certain conversation to trigger based on logic rather than being scheduled. Having the conversation duration set on the conversation setup itself will allow the conversation event to close after a certain amount of time.
Documentation and analysis is very important, but can be tedious. To make your life a little easier during analysis, we suggest that you label both the questions and response choices with friendly names other than "question 1" and "item 1."
You can edit these labels by clicking the "edit" button in the top right corner of the question section.

Once you click "edit" a modal will appear. You will see three tabs.
Under the "general" tab you can change the label for the question:
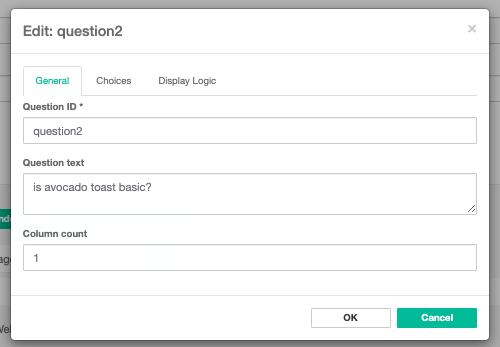
We suggest changing the question ID to something like "avocado toast" or "is avocado toast basic."
The next tab, choices, will allow you to change the labels for the response choices:
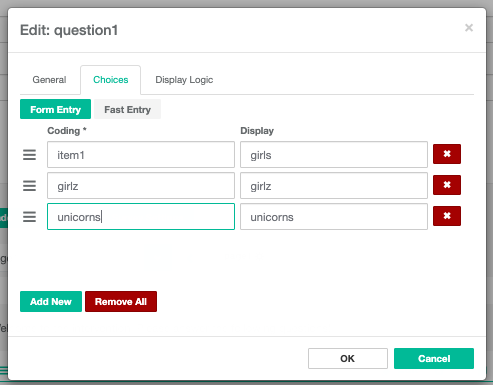
We suggest changing the coding for the response choices to the response choices themselves or a word that describes the response choice.
Note: For Voice Conversations, the order of the choices above determines which number the participant must press during the conversation. e.g. IVR would say "Press 1 for girls, 2 for girlz, 3 for unicorns" for the above Display values. The value entered in Coding will still be saved in the resulting form submission after the conversation ends.
For your multiple choice and yes/no questions with fixed responses, you will be able to build branching logic off of the difference response choices.
For each question with fixed responses, you can click the "edit" button in the top right of the question section.
Here you will see a modal appear with 3 tabs, the third tab named "display logic" is where you will configure the branching logic.
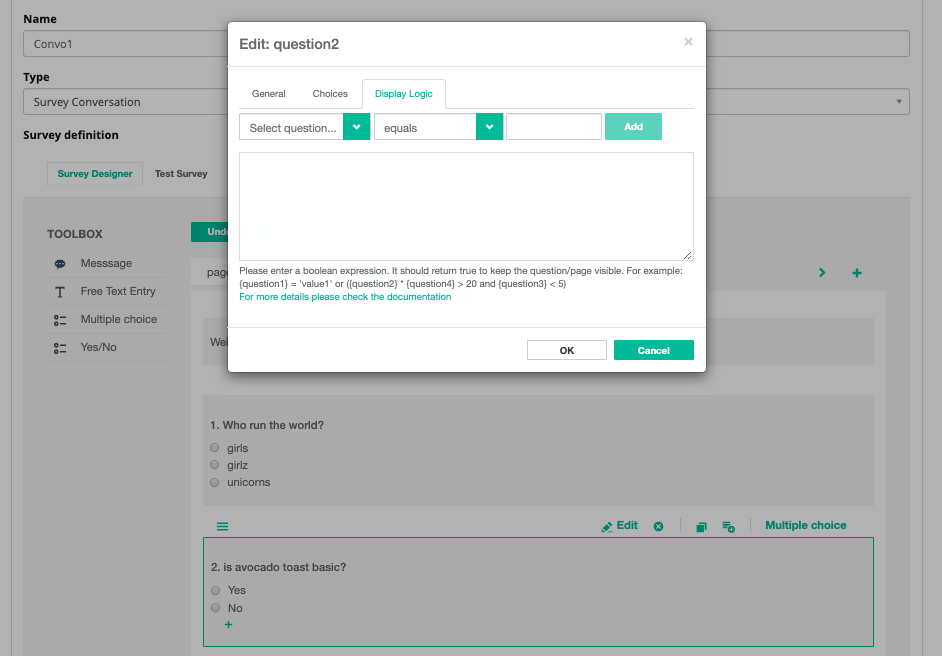
Using the drop down menus, you can decide which answer will branch to which subsequent question. This will allow you to ask participants different questions based on their conversation responses.
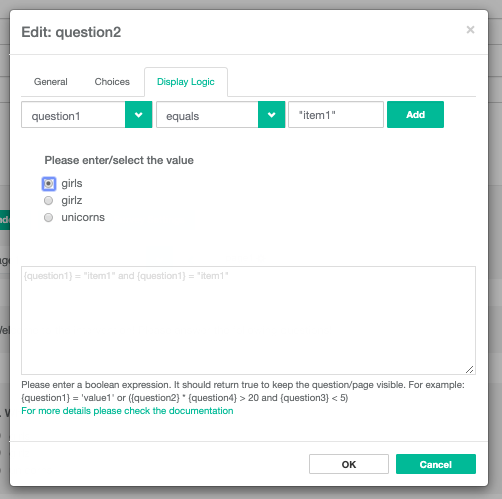
Once you have configured the proper display logic, click "add" and then"okay" to save.
Example: I only want question 2 to appear if the response to question 1 is yes. Then I will go into the "edit" page for question 2, click the display logic tab, and from the dropdown, configure, if "question 1 equals yes."
You can also copy conversations from within your intervention or between interventions you have access to. You can do this by clicking the "Copy Conversation" button in the top right corner.
