Study Arm Target
What is the Study Arm Target Generator?
- Calculates a standard target or goal for all participants assigned to a given arm
- This allows participants to have a set target that is consistent across an arm
 Note: if needed, an individual's target can be modified in their profile
- Permits participants assigned to Arm A to have a different goal than participants assigned to Arm B
- This allows participants to have a set target that is consistent across an arm
- Ability to set different goal parameters including
- Set goal value
- Select type of data input to evaluate, i.e. steps or distance
- Define start date and end date of target
How do I set up the Study Arm Target Generator?
- Navigate to the 'Target Configurations' section of Manage Study.
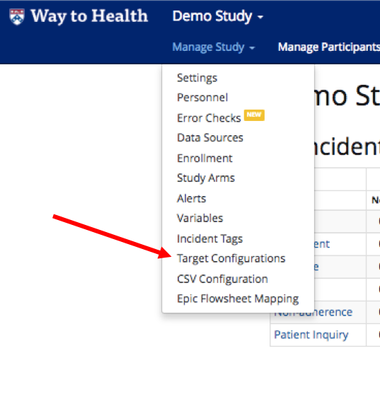
- Under Target Configurations, select 'New'.

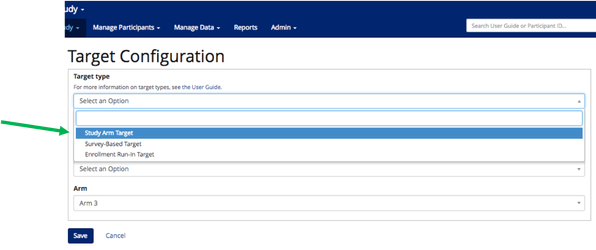
- The Target Configuration screen will pop up. In the 'Target Type' drop down, select 'Study Arm Target'.
- Once selected, WTH will display the target set up fields. Fill out fields based on the way the target should work. See below for more help on how to fill out the various sections!
Target Configuration main settings

- Data Source: Select the device that the target should look at.
- Haven't set up your devices yet? Go to the 'Devices' section of Manage Study.
- Haven't set up your devices yet? Go to the 'Devices' section of Manage Study.
- Data Field: Select the data that the target should look at. This should be the same selection field that is set up in the Device Settings.
- Example: Fitbit = steps, Withings Scale = weight
- Example: Fitbit = steps, Withings Scale = weight
- Arm: Choose the arm that will have this target generator. This allows you to have different criteria across arms.
- Want the same target for both Intervention and Control? Just created the same target generator twice, swapping out the arm!
- Haven't built the study arms yet? Go to 'Study Arms' section of Manage Study
- Starting value: Choose the default goal value for all participants assigned to this arm.
- Example: 7000 steps for a pedometer or 480 minutes for a sleep wearable
- Data Source: Select the device that the target should look at.
Scheduling
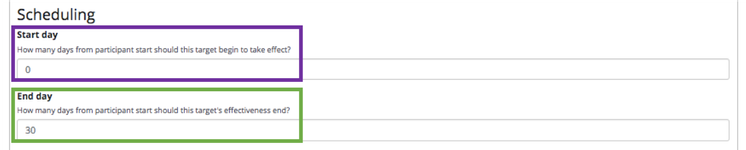
- Start Day: Select the day that the target should start. If you only have one target, this is typically at study start, or Day 0.
- End Day: Select the day that the target should end. Again, if you only have one target for the study duration, this is typically the last day in the study.
- Tip! Want to create a target ramp up? You can do this with the scheduling feature!
- Example: Target runs from Day 0-29 and then the target increases on Day 30-59 and increases again Day 60-89. You can achieve this by creating 3 different targets!
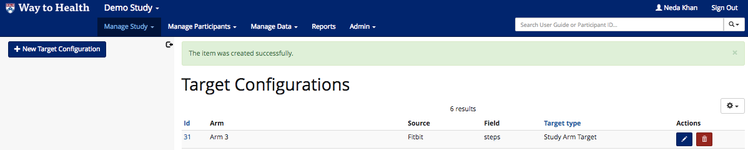
Once you are done building your Study Arm target generator. Click 'Save'. The new target will now appear in your Target Configurations overview page.
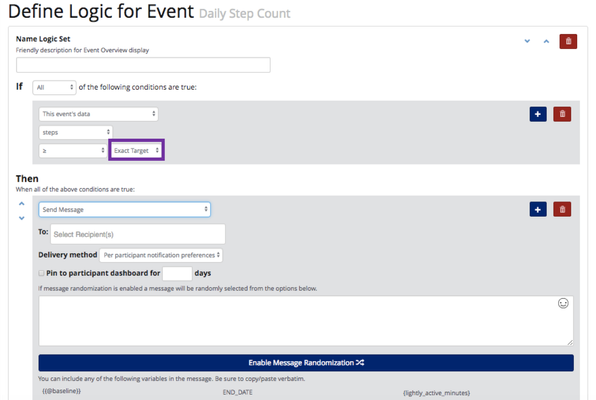
 Now that you have the Target Generator built, you can use it in Study Arm event logic! For more on building events and adding logic, see Events by Type
, multiple selections available,