...
 Unsure how to build enrollment? See How to Build the Old Enrollment Process for guidance!
First, determine how participants are enrolling in the project.
...
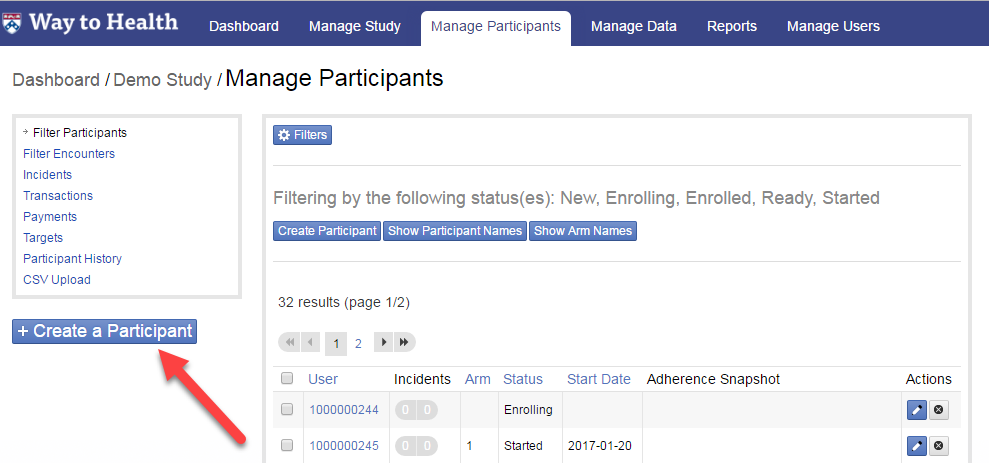
- Creating a test participant on the backend site
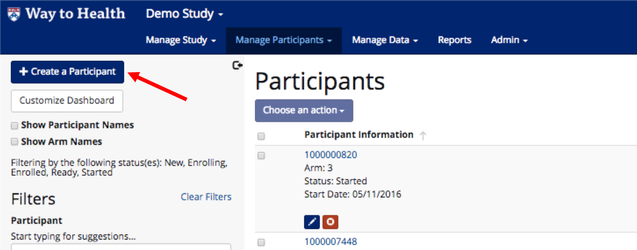
- Under manage participants, select the 'Create a Participant' button.
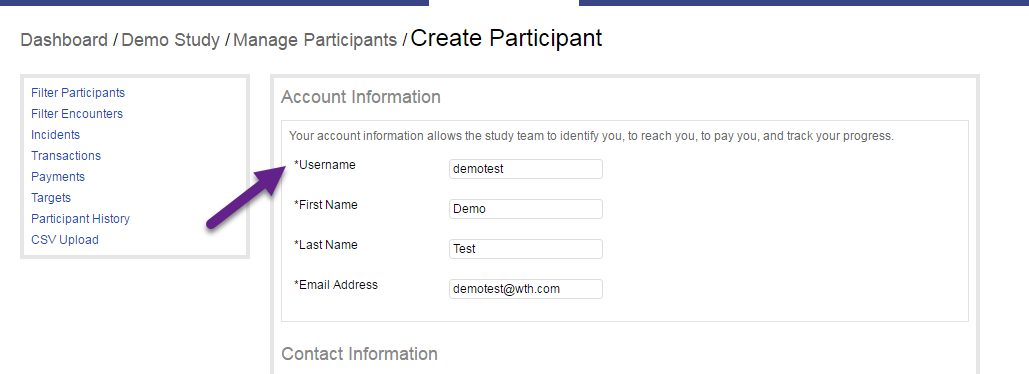
- Complete the test participant profile. Any field with an asterisk next to it is a required field. Then scroll down and select 'Save Profile'.
 Be sure that any field needed for your project is a required field!
 - For example, a bi directional texting project should have cell phone number as mandatory in order to save the profile.
- You can customize which fields are hidden, optional, required in Manage Study --> Advanced Settings, if you have Project Manager credentials.

- You are now ready to test enrollment! You can access enrollment in 1 of 3 ways as outlined below.
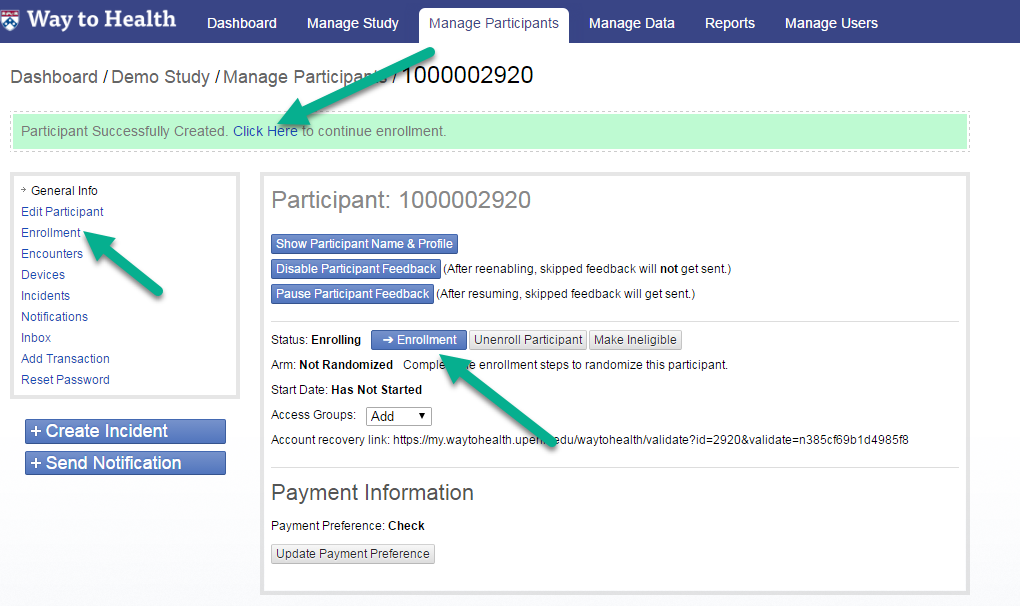
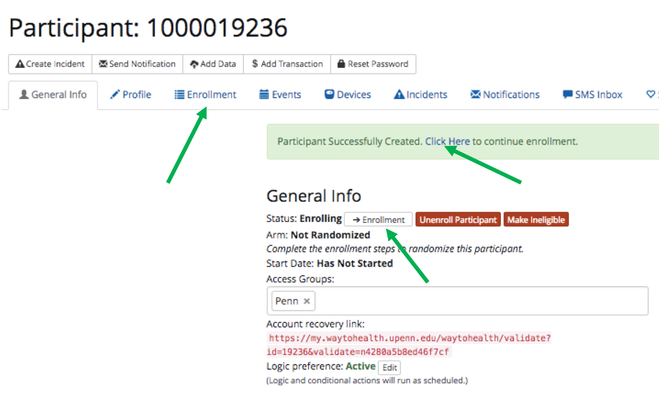
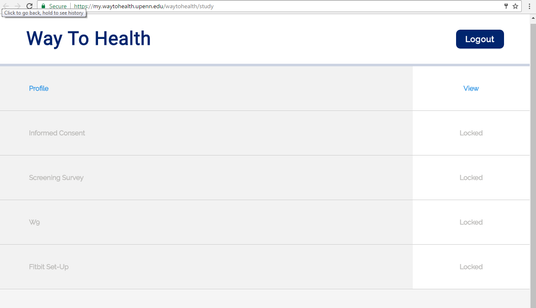
- You should now see your enrollment overview and are ready to test enrollment!
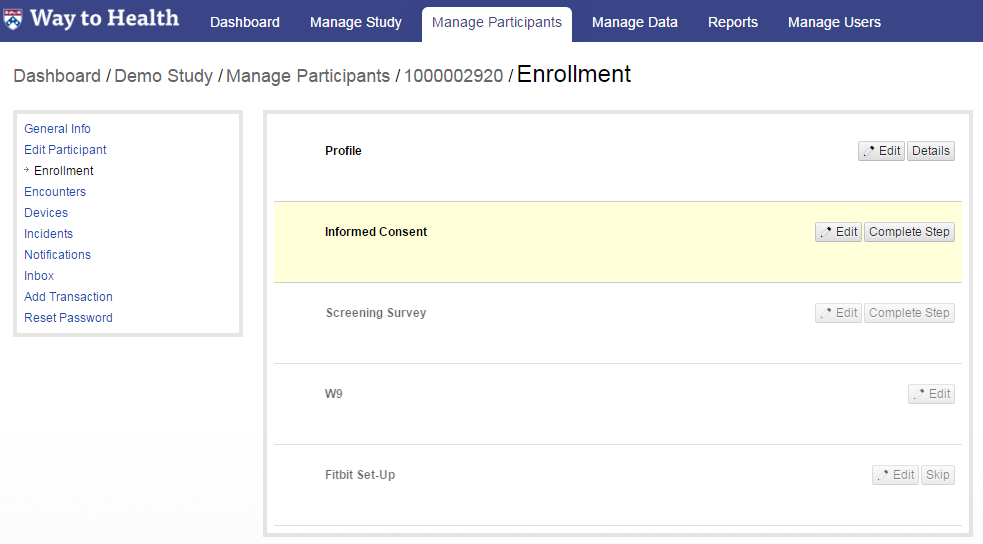

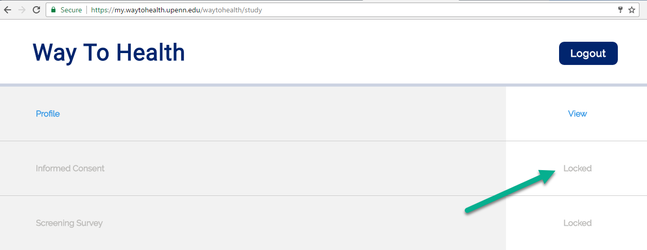
- When enrolling participants on the backend, you will see that completed steps are white, the next step to complete is yellow, and any locked steps (due to prerequisites) are grayed out.
- When walking through enrollment, be sure that the prerequisites set up correctly.
- Testing the various types of enrollment events:
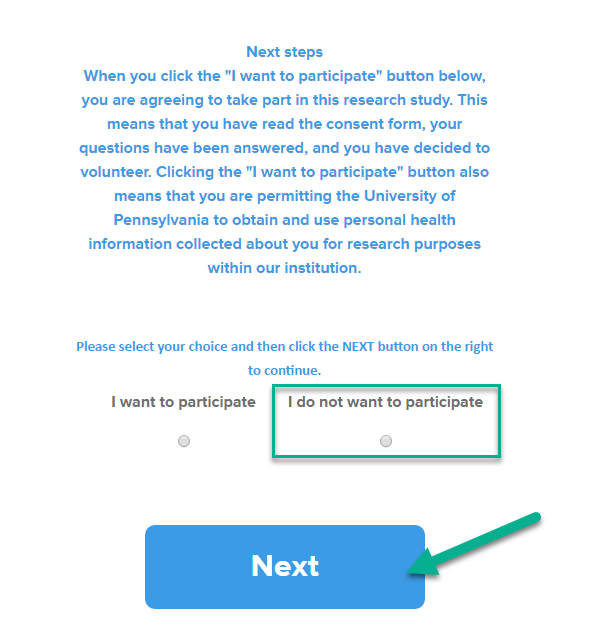
- Informed Consent
- Make sure that the formatting looks appropriate
- Read through the entire informed consent looking for incorrect information, grammatical errors, and spelling mistakes.
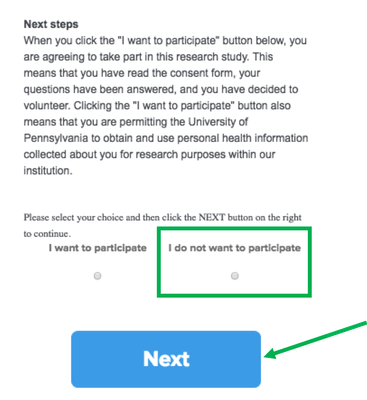
- Make sure that if you select "I do not want to participate", that the test participant is stopped from moving forward.

- Screening Survey
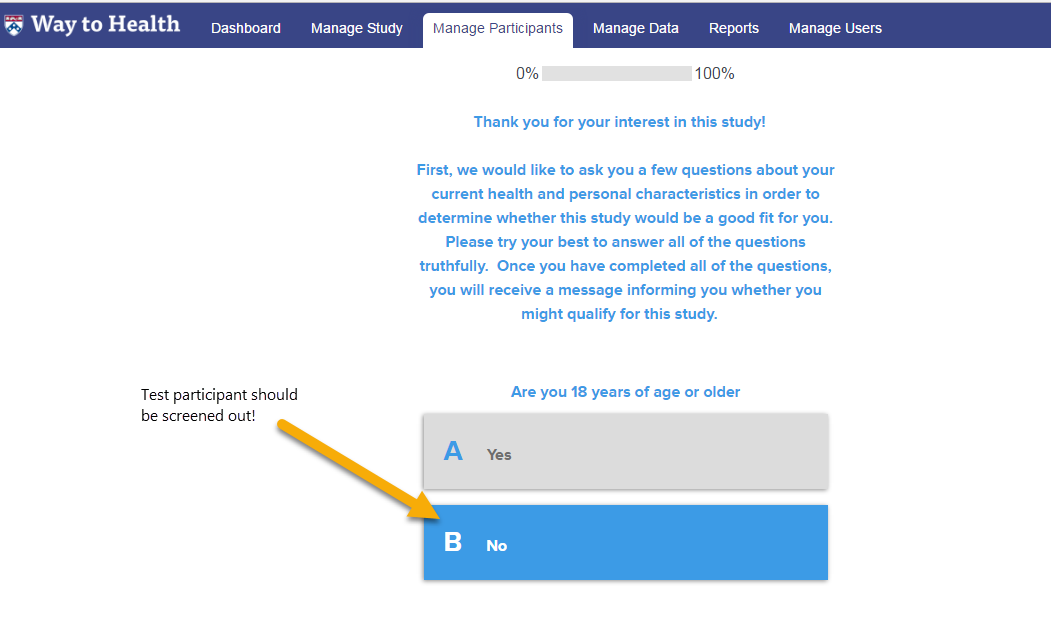
- Testing the screening survey will take multiple test participants in order to test every eligibility criteria. You should test a scenario that should make you eligible for the project, as well as each of the criteria that makes a participant ineligible (i.e. answering 'no' to are you over the age of 18).
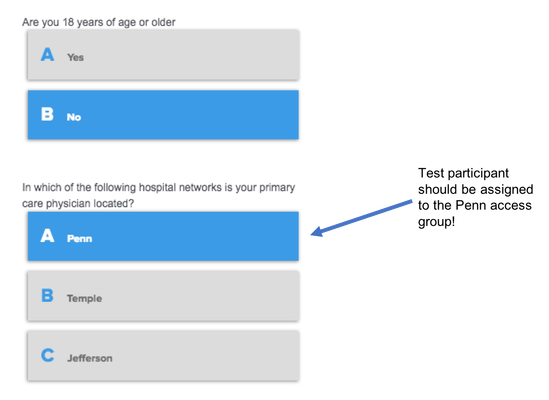
- If the screening survey is also being used for arm assignment or access group assignment, be sure that you are enrolled into the proper arm/access group.
- Testing the screening survey will take multiple test participants in order to test every eligibility criteria. You should test a scenario that should make you eligible for the project, as well as each of the criteria that makes a participant ineligible (i.e. answering 'no' to are you over the age of 18).
- W9
- Reminder! If your project is paying participants via the WTH platform, you MUST have a W9 collection in order to pay participants.
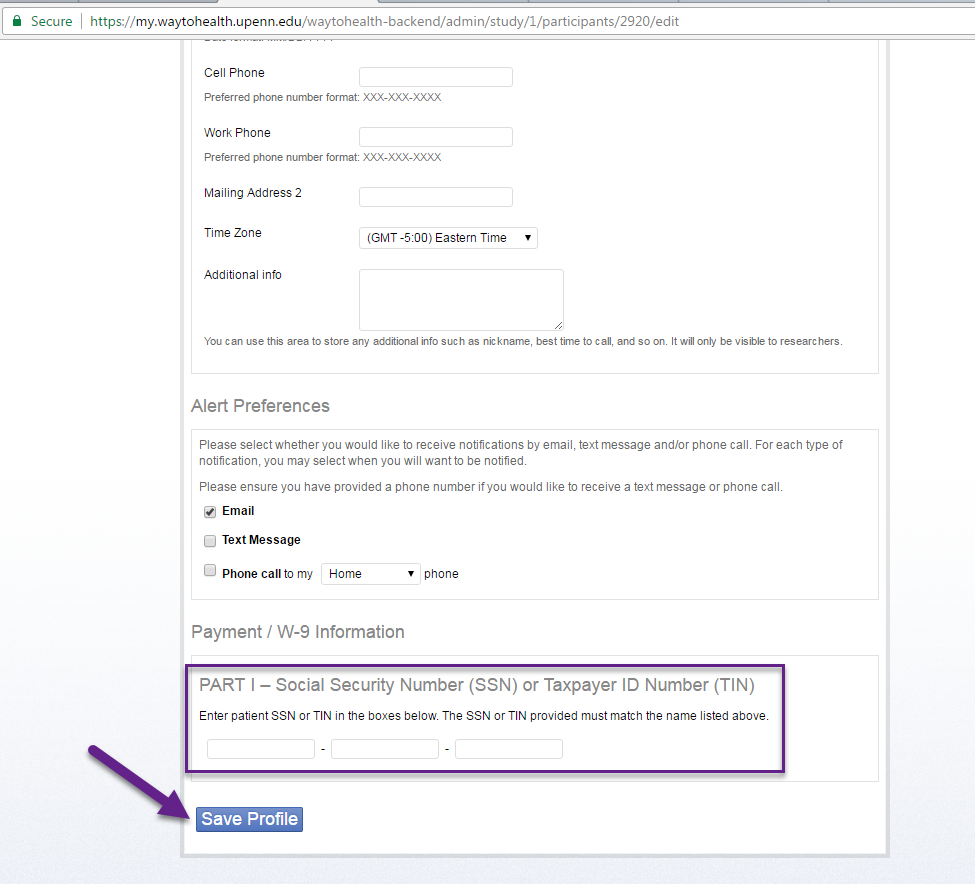
- When you get to the W9 step, you will see that there is not a "complete step" button. Instead navigate back to the profile by clicking "Edit Participant" to submit the SSN.
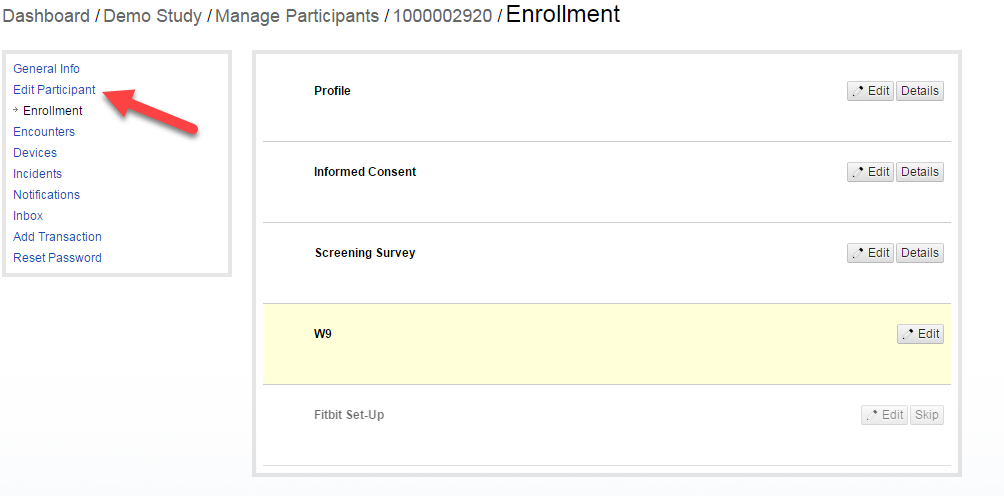
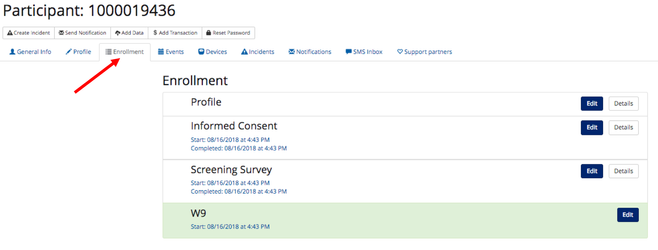
- Enter a 'dummy' SSN (i.e. 111-11-1111) and click "Save Profile". Navigate back to the enrollment tab.
- Device authorization
- When you get to the device authorization step, you will notice that there is not a "complete step" button. This is because the participant must enter their device credentials (i.e. Fitbit username and password). Authorizing WTH to collect device data can only be completed on the frontend dashboard.
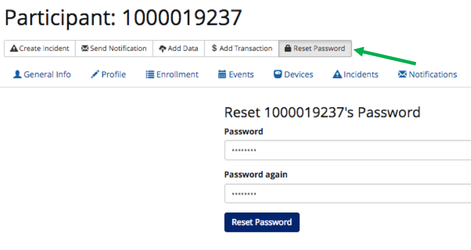
- Reset the password for the test participant
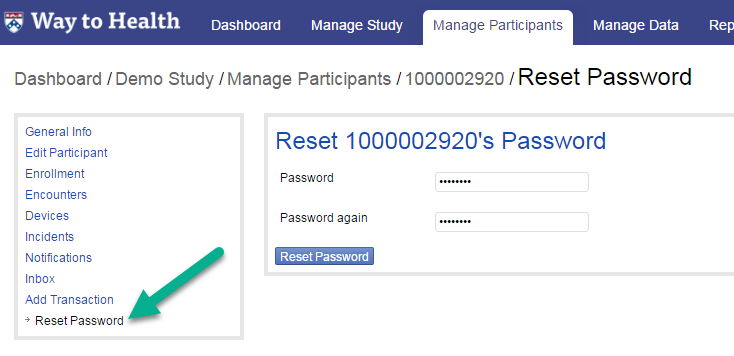
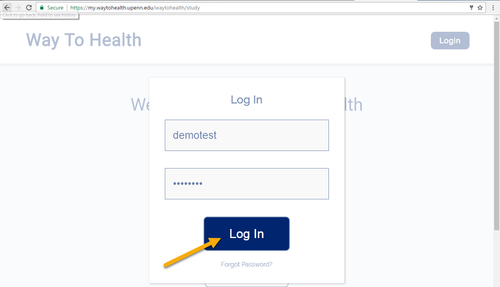
- Open a new tab and log into the test participant account with the new password and the email address or username you selected.
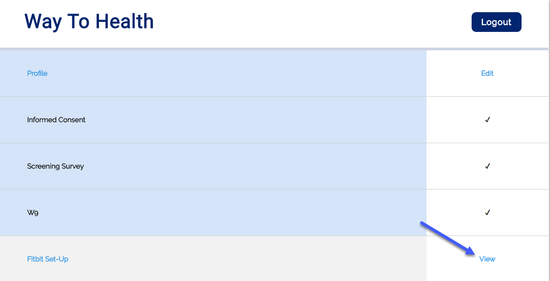
- Click "View" on the device authorization step.
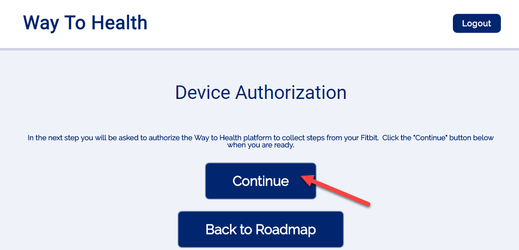
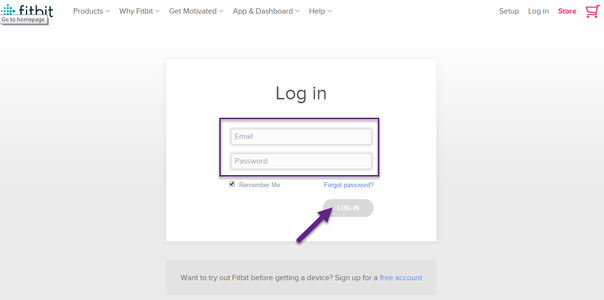
- Click "Continue". WTH will reroute to Fitbit.
- Enter the credentials for your Fitbit username and password, then click "Log In". Fitbit will then reroute back to WTH.
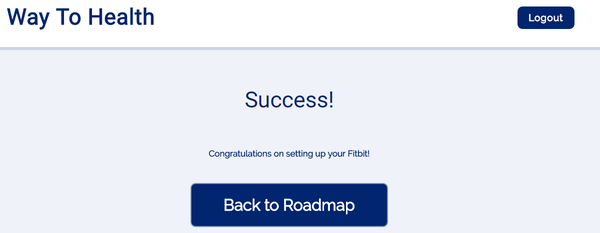
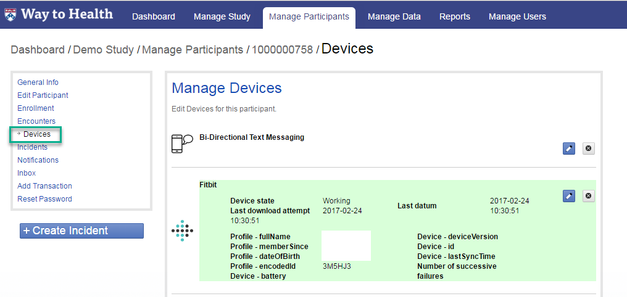
- Be sure that the device authorized properly. You should see a success message on the dashboard. You should also see the device authorization on the participant's device tab with the device information.
- Reset the password for the test participant
- When you get to the device authorization step, you will notice that there is not a "complete step" button. This is because the participant must enter their device credentials (i.e. Fitbit username and password). Authorizing WTH to collect device data can only be completed on the frontend dashboard.
- Device confirmation
- Make sure that at least one data point (i.e. step count) comes over within the next hour. You can check Manage Data or the enrollment step will close out.
- Make sure that at least one data point (i.e. step count) comes over within the next hour. You can check Manage Data or the enrollment step will close out.
- Informed Consent
- Under manage participants, select the 'Create a Participant' button.
- Enrolling a test participant on the frontend participant facing site
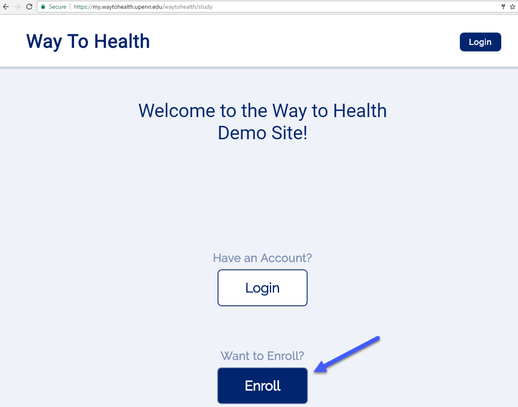
- Navigate to the frontend site.
- Unsure of the URL? It can be found easily under Study Settings!
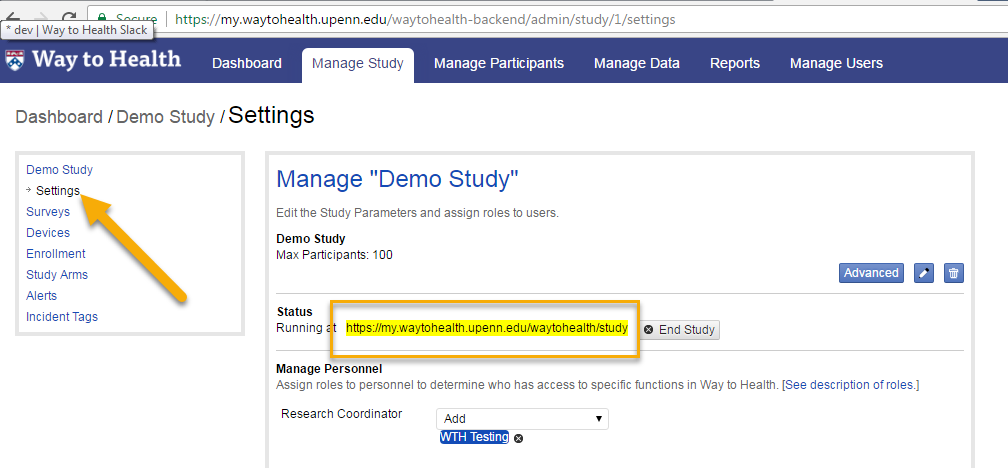
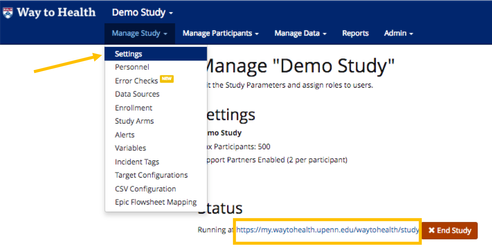
- Unsure of the URL? It can be found easily under Study Settings!
- Once on the participant facing site, click the blue "Enroll" button.
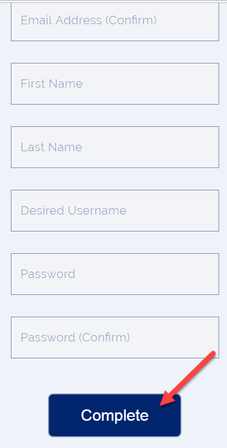
- Fill out the fields and click 'complete'.
- Tip! WTH only allows one email address per user. In order to create multiple test participants with the same email account, add "+numbers" to the end of your email. For example, waytohealth+123@gmail.com or waytohealth+56@gmail.com. This will create unique email addresses, but all notifications will still go to your waytohealth@gmail.com account!
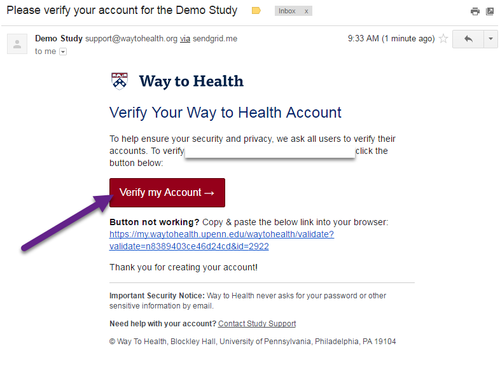
- Navigate to your email and click the "Verify my Account" button.
- You will be rerouted to the WTH site and immediately logged in to complete the enrollment steps. You are now ready to test enrollment!
- When walking through enrollment, be sure that the prerequisites set up correctly. This means that steps should be grayed out and locked until the previous step has been completed.
- Unlike enrolling participants on the backend, you need to make sure for each step that the instructions are clear and that there are no grammatical or spelling errors.
- Testing the various types of enrollment events:
- Informed Consent
- Make sure that the formatting looks appropriate
- Read through the entire informed consent looking for incorrect information, grammatical errors, and spelling mistakes.
- Make sure that if you select "I do not want to participate", that the test participant is stopped from moving forward.
- Screening Survey
- Testing the screening survey will take multiple test participants in order to test every eligibility criteria. You should test a scenario that should make you eligible for the project, as well as each of the criteria that makes a participant ineligible (i.e. answering 'no' to are you over the age of 18).
- If the screening survey is also being used for arm assignment or access group assignment, be sure that you are enrolled into the proper arm/access group.
- Testing the screening survey will take multiple test participants in order to test every eligibility criteria. You should test a scenario that should make you eligible for the project, as well as each of the criteria that makes a participant ineligible (i.e. answering 'no' to are you over the age of 18).
- W9
- Reminder! If your project is paying participants via the WTH platform, you MUST have a W9 collection in order to pay participants.
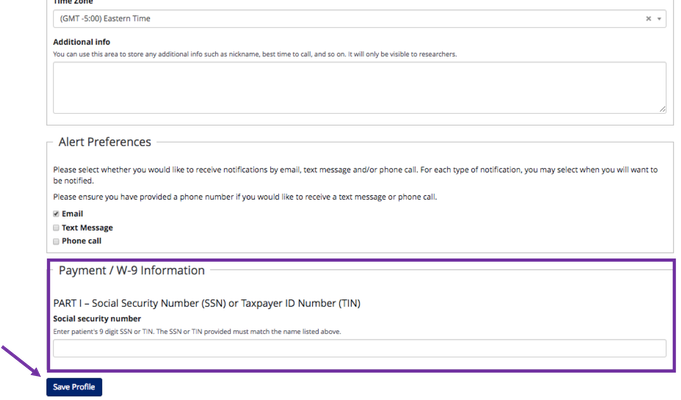
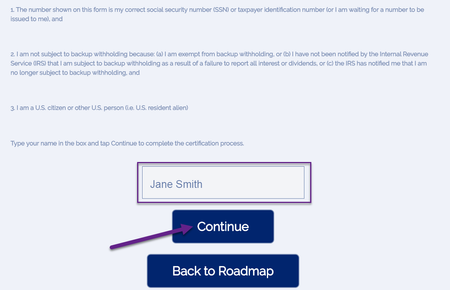
- When you get to the W9 step, enter a 'dummy' SSN (i.e. 111-11-1111) and select the check box.
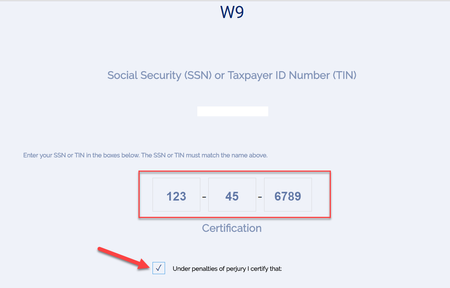
- Enter your name and click "Continue".
- Device authorization
- Click "View" on the device authorization step.
- Click "Continue". WTH will reroute to Fitbit.
- Enter the credentials for your Fitbit username and password, then click "Log In". Fitbit will then reroute back to WTH.
- Be sure that the device authorized properly. You should see a success message on the dashboard. You should also see the device authorization on the participant's device tab with the device information.
- Click "View" on the device authorization step.
- Device confirmation
- Make sure that at least one data point (i.e. step count) comes over within the next few hours. You can check Manage Data or the enrollment step will close out.
- Informed Consent
- Navigate to the frontend site.


...