Once your project is built, tested, and launched with real participants, your team will need to manage your WTH site. The following information includes some tips and tricks on how to maximize the features that Way to Health offers in order to smoothly and efficiently run a project on the platform.
...
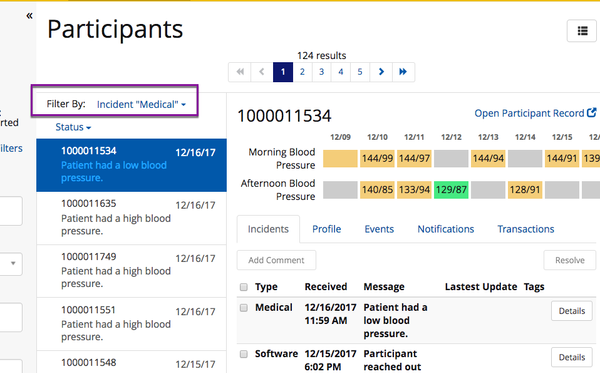
- Filtered by incident type
- Why is this so great? It allows you to address the medical incidents first and then move on to the less critical incident types.
- Want to take a look at the medical incidents more closely? Click 'Medical' and you will see only the outstanding medical incidents.
- The most recent medical incident will be displayed at the top of the list.
- The most recent medical incident will be displayed at the top of the list.
- Why is this so great? It allows you to address the medical incidents first and then move on to the less critical incident types.
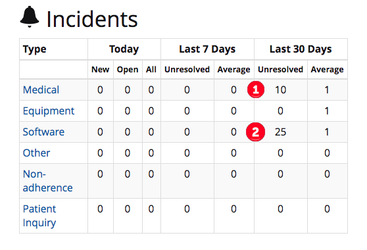
- Quickly view any outstanding incidents that need to be reviewed and handled per study protocol
- Sees incident trends over the past day, week, and month
Devices
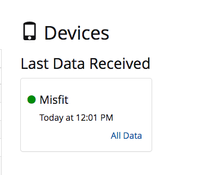
The Devices snapshot shows you the last time that the platform received device data. This allows you to quickly indentify if data has stopped flowing properly into the platform.
For example, if the study hasn't received pedometer data since yesterday, that might indicate a problem and suggests further inquery is needed.
Enrollment
Composing those pesky recruitment reports can be so time consuming! The enrollment section gives you a glimpse into how close you are to meeting enrollment milestones and quickly report out on recruitment numbers.
...
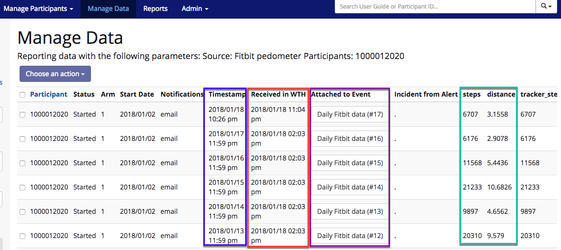
- Filter for Source (i.e. Fitbit) and select a participant or leave blank to get data on all participants. Scroll down and click the Filter button.
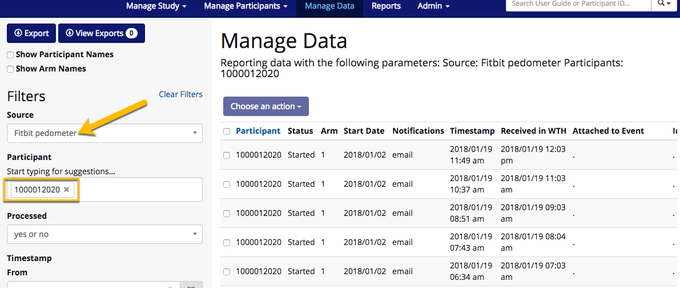
- View data on the participant.
 Tip! Understand the Manage Data columns
- Timestamp- the date and time that the participant sent in data (ex: synced their Fitbit)
- Received in WTH- the date and time that the data flowed into Way to Health. This time may match the Timestamp time, or may have a slight lag of a few minutes.
- For devices like pedometers, if the participant syncs well after the event closes (i.e. a couple of days late), the 'Received in WTH' date will be very different from the Timestamp date.
- Attached to Event- The data was linked to an event and the event is now marked as 'complete' and feedback was applied.
- Additional columns (i.e. steps, distance, etc.) are specific to each device.
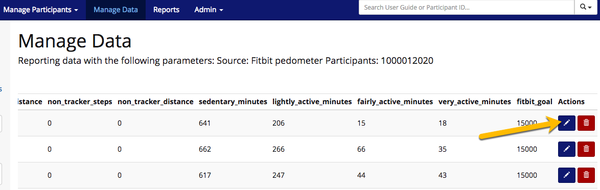
- Edit data
Data should only be edited in rare cases. In general we don't want to alter the data in order to preserve project integrity!Status colour Red title STOP ! - If you have Project Manager credentials, you have the ability to edit the data.
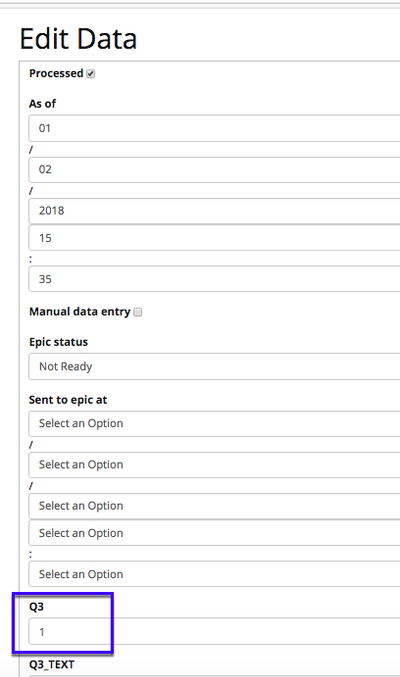
- Tip! This is particularly useful if a participant answers a survey question incorrectly and you want to update to reflect their true response.
- Click the blue pencil icon under Actions.
- Update the coded response, add an incident for changing the data, and click 'Save'.

 Not sure where to look or what next steps to take?? Put in a JIRA Help ticket and the Ops team will help you out!
...