Event Blocks
Event Blocks allow you to schedule a series of events such as messaging, text conversations, and surveys based on a participant-specific date. This could be a date collected from an external data source such as an electronic health record, a survey response, or an upload of appointment data. It could also be the participant’s birthday or a specific holiday such as New Years Day.
Here are some examples of how Event Blocks could work for you:
I only want the patients to get certain messaging when they are discharged from the hospital.
I only want participants who have texted in that they have given birth and are back at home to get a certain text conversation asking them about the health of their baby.
I want to allow my participants to enter their therapy schedule via a survey and only trigger certain messaging on the day after their appointment.
Create an Event Block
Navigate to Manage Study>Study Arms>Manage Event Schedule. Here you will see the option to create a new event block by clicking the "New Event Block" button in the top left corner of the page.
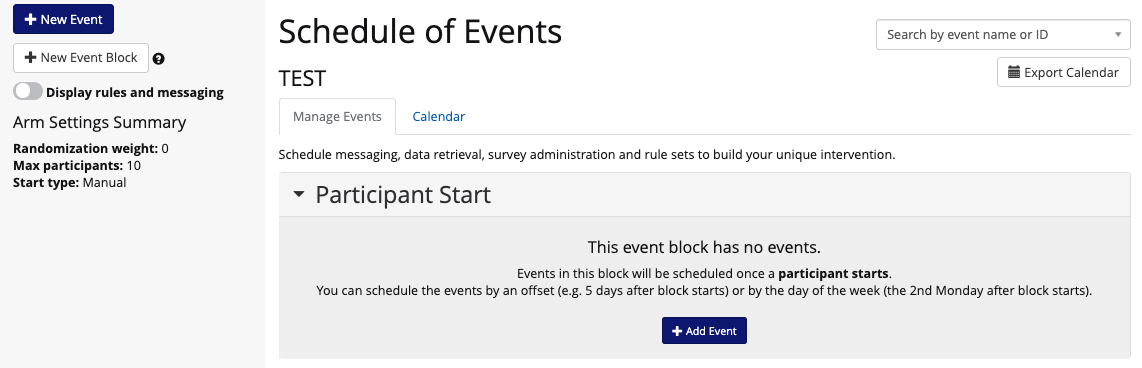
You are automatically given an event block in which you can schedule events for participants based on their start dates.
You can also create a new event block based off of a data trigger by clicking the "New Event Block" button in the top right corner.
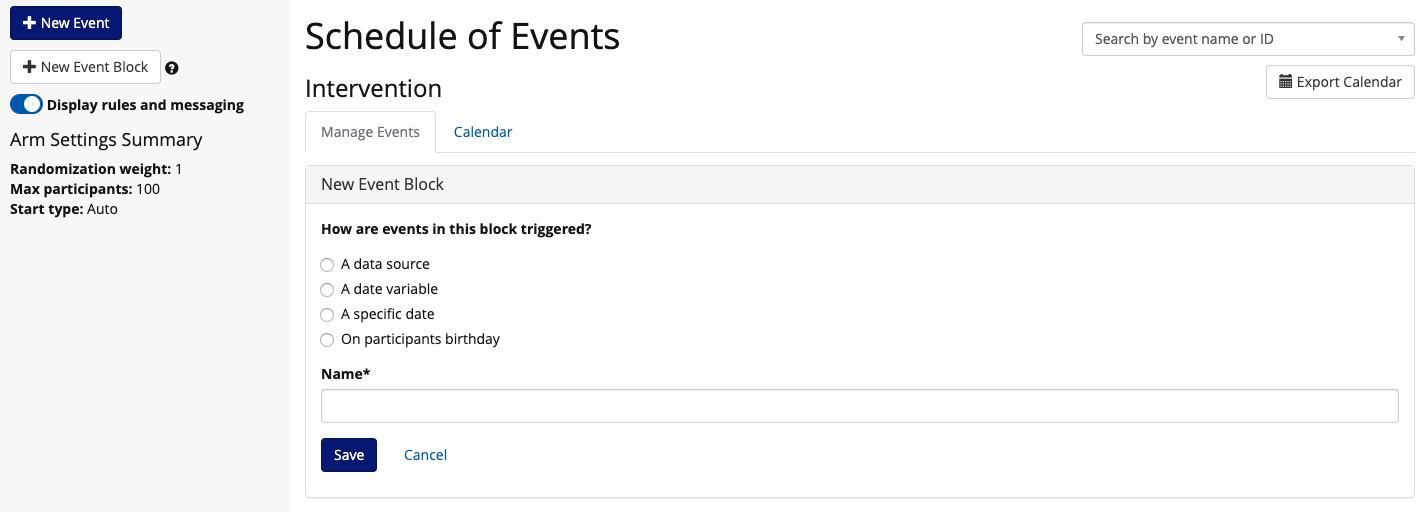
You can choose the event block to trigger off of:
- a data source
- example:survey response, csv upload, text message, device data
- a date variable
- example: customized date for the participant such as a smoking quit date
- a specific date
- example: New Year's Day 2021
- a participant's birthday
If you choose to trigger the event block based on a data source, you will see an expanded form of fields to complete to specify the exact data point(s) you will be using as a trigger for this event schedule.
- Choose data source
- Name event block
- Select the data source for the trigger
- Select date field (timestamp is most common, this means the time in which the data field in completed)
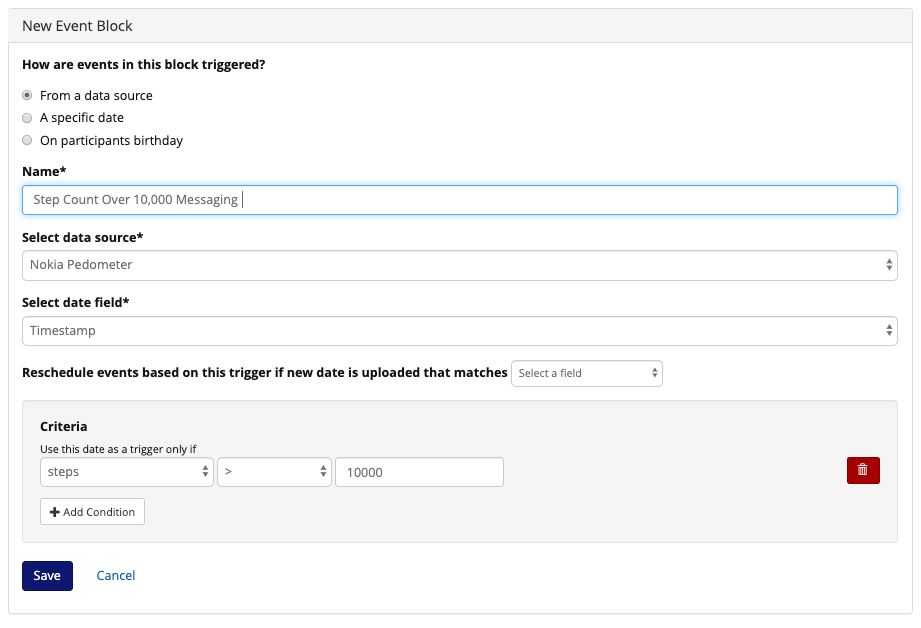
Under Criteria, you can specify exactly which data points and ranges you want to use in order to trigger this event block.
As you can see in the example above, I clicked "Add Condition" and created one criteria for this event block. A condition could be a survey response, text response, csv data upload, device data point, etc.
In the example above you see that I chose steps as my data point and specified that if steps are greater than 10,000. This would mean that only participants with a recorded value of steps greater than 10,000 would receive the events in this block.
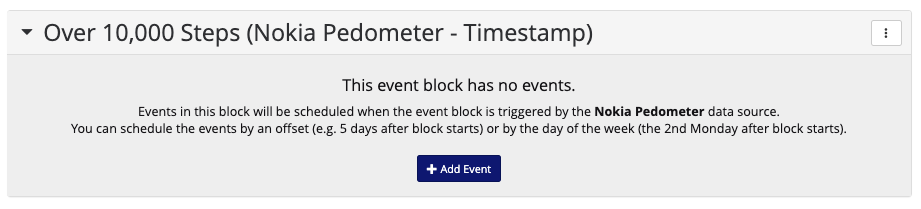
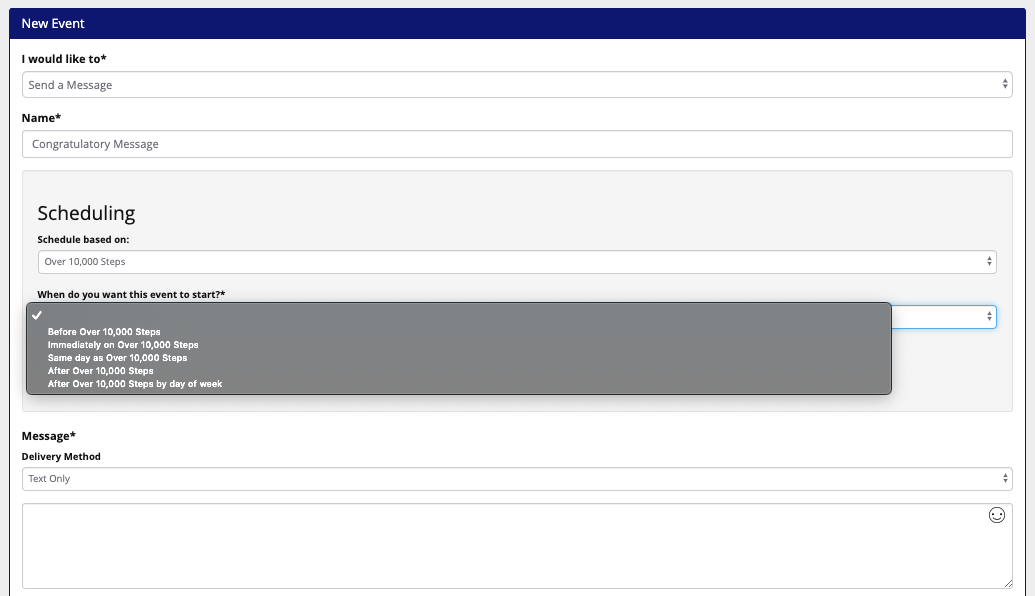
Once your event block is created, you will be able to add any type of event to this schedule.
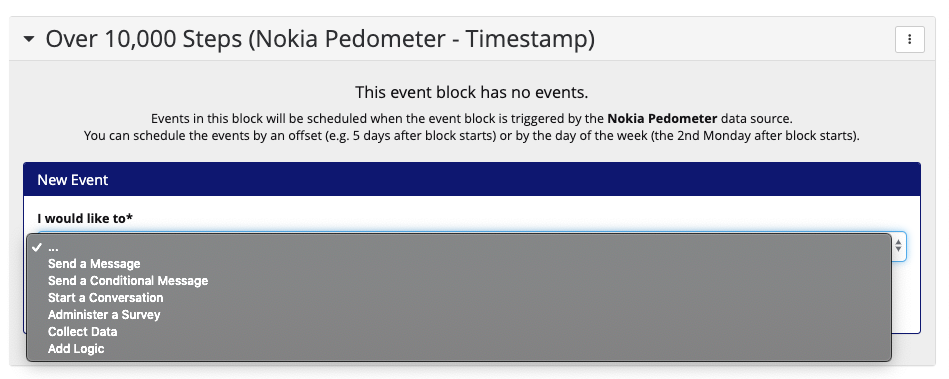
Your events can be scheduled based on the timestamp of the schedule:
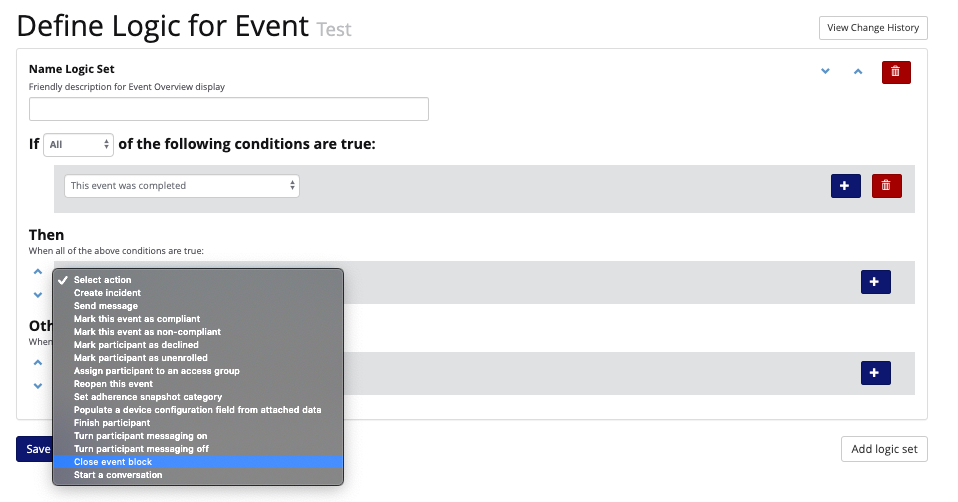
Close Event Blocks
You can also end an event block based on data or logic. In an events logic you can choose in both the "then" and "otherwise" categories to "close event block."
Simulate event blocks
You can simulate how event blocks will look once they are scheduled through the arm-level calendar.
Simulate event block start dates from the calendar view while you build your intervention. Specify a date and apply it to the calendar to see what a participant's schedule might look like based on incoming dates from external data sources.
Go to manage study>study arms>manage event schedule and then click into the calendar tab.
At the bottom of the page you will be able to see a section allowing you to simulate events.
