/
Messaging Service
Messaging Service
- Former user (Deleted)
Owned by Former user (Deleted)
Last updated: Aug 16, 2021
If your program will be sending high volumes of texts to participants, you may want to use a Messaging Service. Messaging Service allows us to use several numbers for a single project to send many texts to patients across the program.
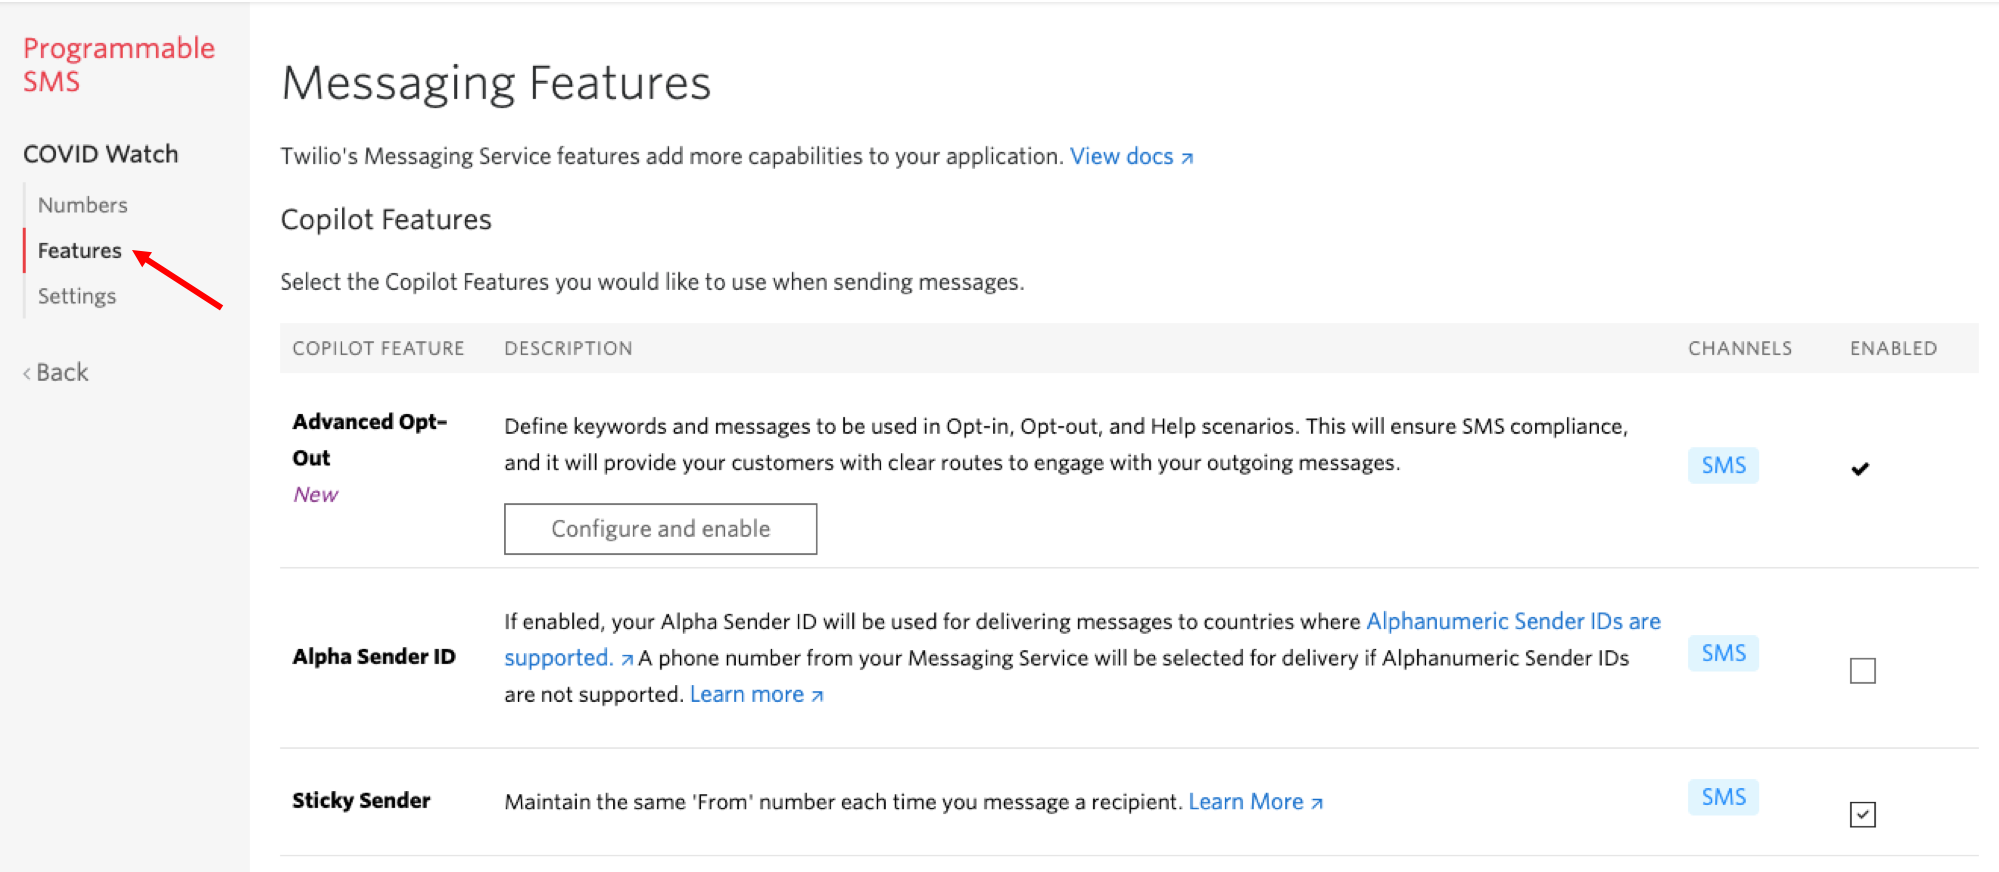
The features that come with the Messaging Service are:
- Customize Advanced Opt-Out language for your project
- Have a Sticky Sender which links a participant to a single number within the bank of numbers
- Use the Scaler to distribute the messaging traffic the bank of numbers evenly
- Ensures to Geomatch the number used to text a participant comes from a number with an area code close to their number's area code
- And many more! If you want to read more about these features you can access Twilio's Messaging Service documentation.
To setup a Messaging Service for a project, you can follow these steps:
Note that you will want to buy the numbers you want to incorporate with the Messaging Service ahead of time.
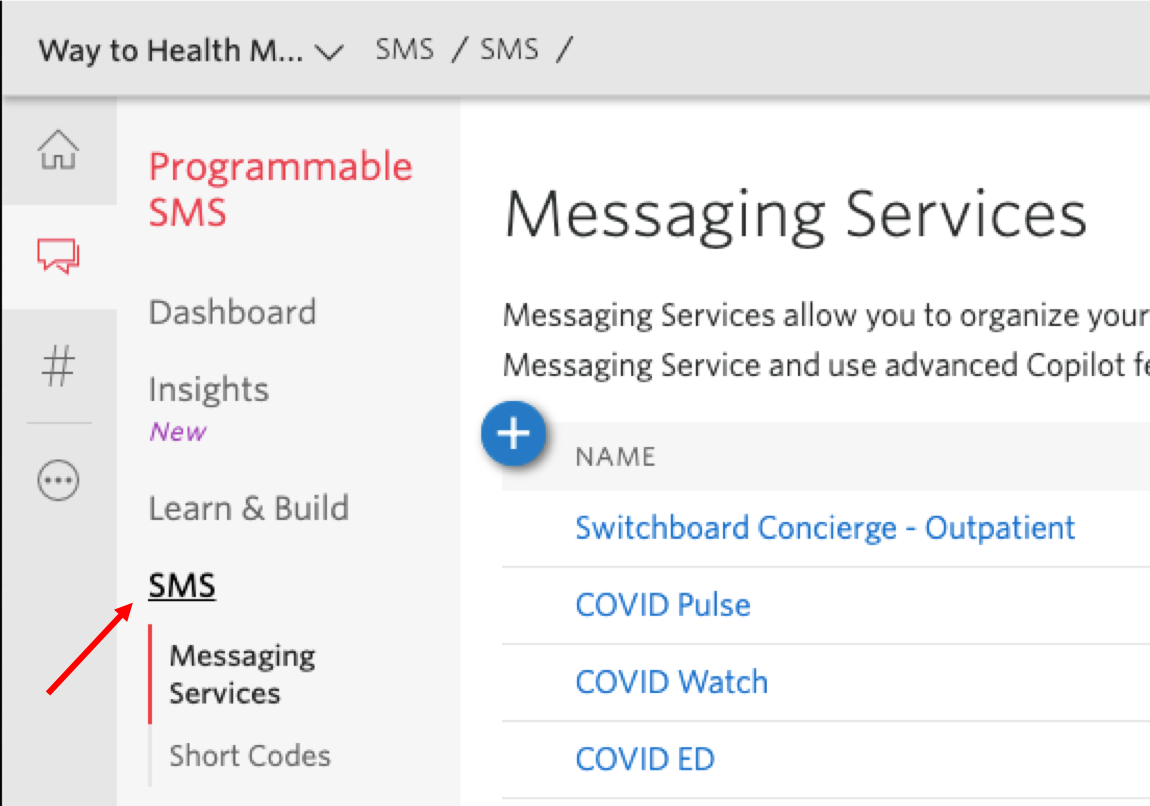
- Login to Twilio and click on the chat bubble symbol to get to the SMS Logs page.

- Click the SMS link and it will open up the Messaging Services page.
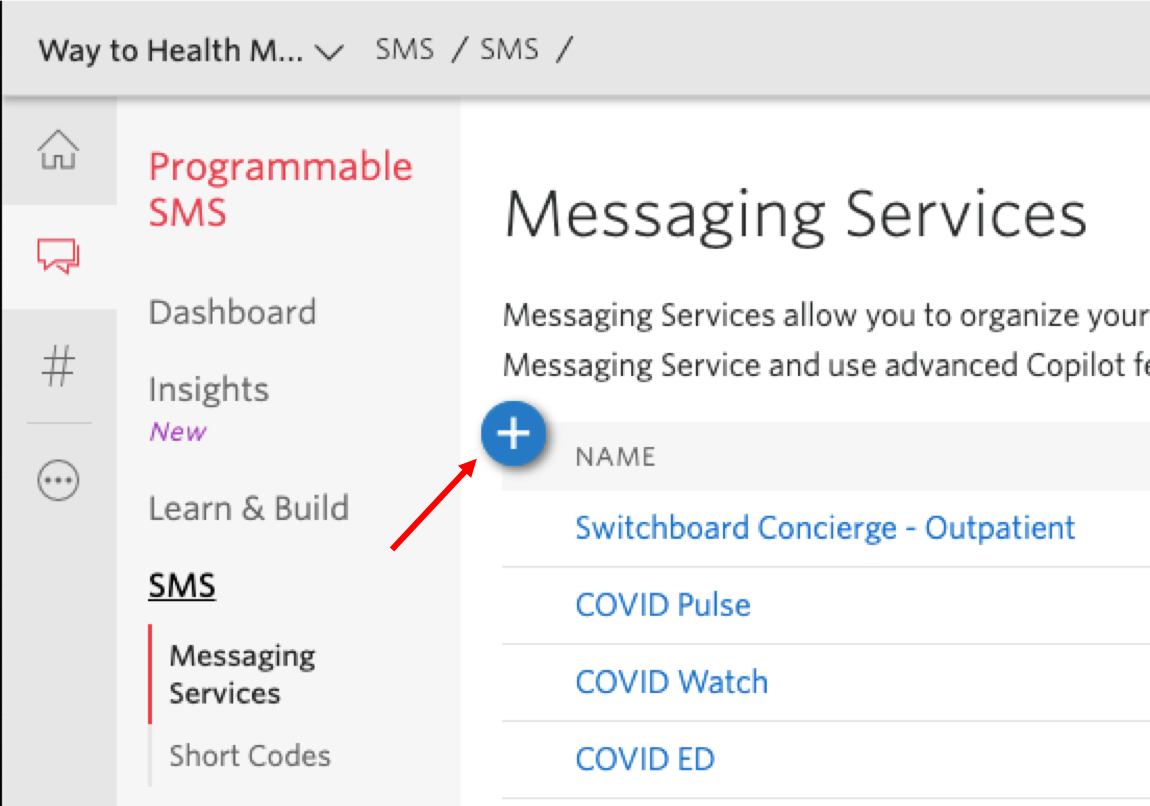
- On that page you can click the "+" button to create a new Messaging Service.
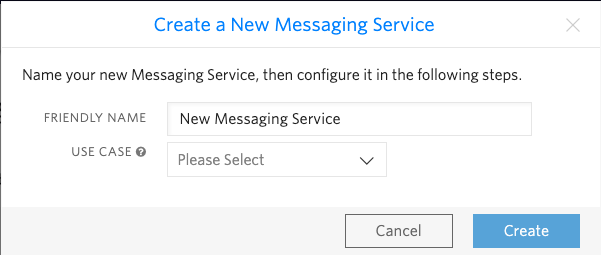
- A pop-up will trigger where you can enter the Friendly Name for the Messaging Service. For the Use Case, you will want to select "Mixed".
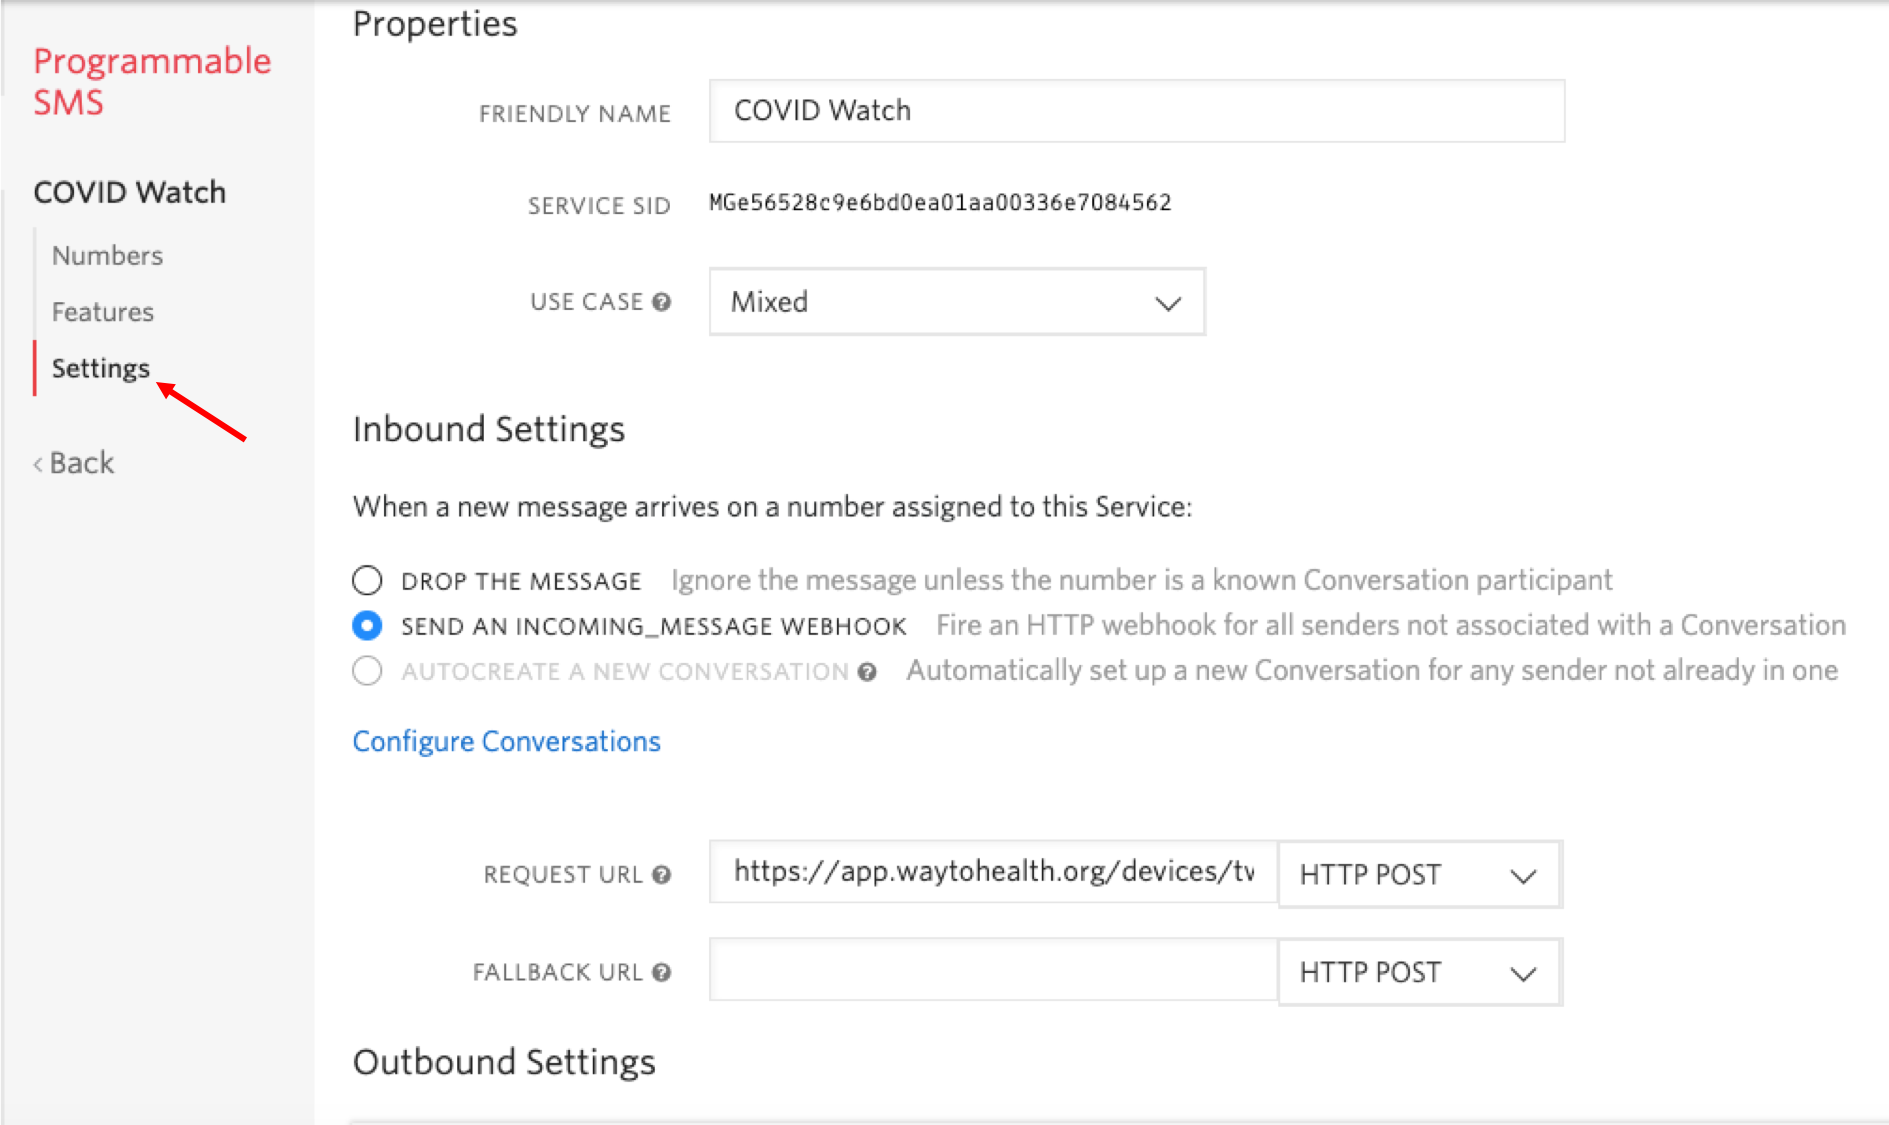
- Once you have created a new messaging service, it will open up its Settings. For Inbound Settings, select "Send an incoming_message webhook" and include this URL in the Request URL field: https://app.waytohealth.org/devices/webhook. In the Fallback URL field, put: https://twimlets.com/echo?Twiml=%3CResponse%3E%3CMessage%3EDue%20to%20a%20system%20error%2C%20your%20message%20was%20not%20received.%20Please%20try%20again%20in%20a%20few%20minutes.%3C%2FMessage%3E%3C%2FResponse%3E You do not need to setup any Outbound Settings.
- In the Features page, you will be able to enable other features as previously mentioned (Advanced Opt-Out, Sticky Sender, etc.).
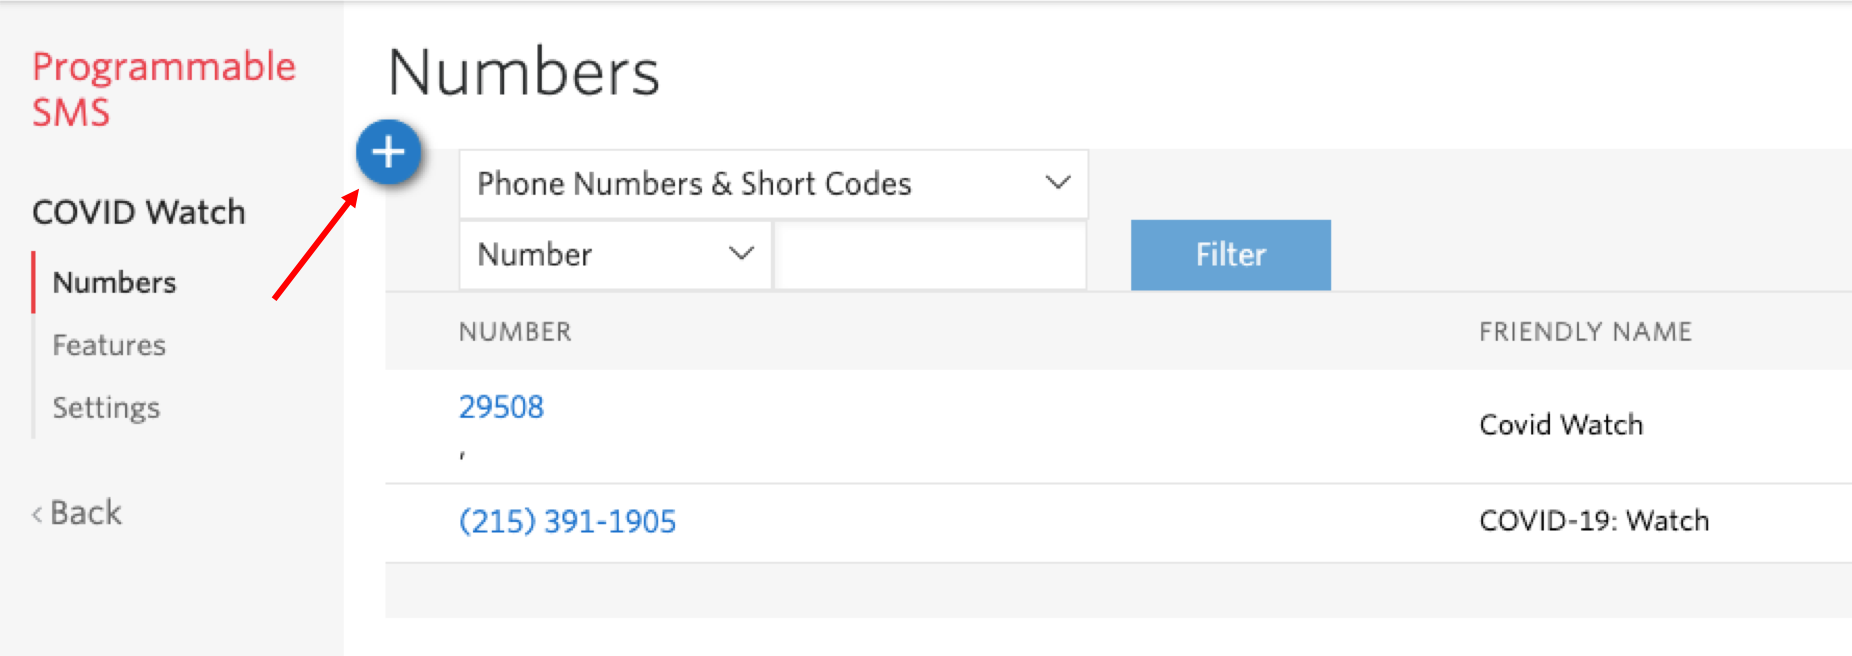
- Lastly, you can navigate to the Numbers page to add the Twilio numbers you bought for the Messaging Service. Click the "+" button to search for the Twilio number and add it there.
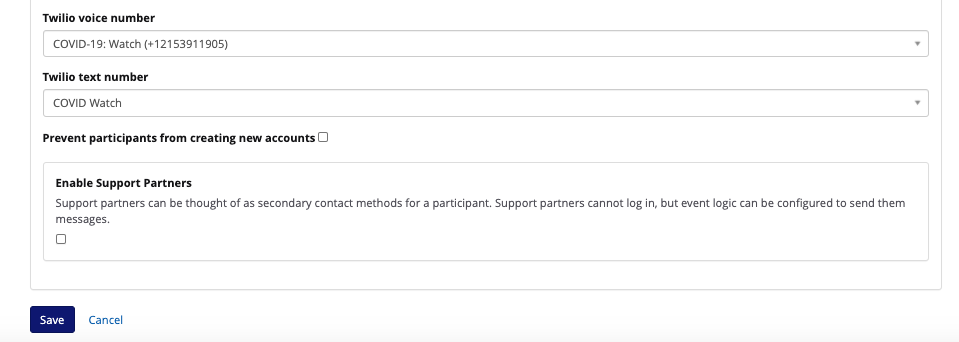
- Once you have the Messaging Service setup in Twilio, you will need to go back to W2H Manage Study → Settings and update the Twilio Text Number to use the new Messaging Service.
, multiple selections available,
Related content
Twilio Message Failure Incidents
Twilio Message Failure Incidents
More like this
Phone numbers in uploads
Phone numbers in uploads
More like this
Setting up embedded analytics in W2H
Setting up embedded analytics in W2H
Read with this
Diet ID
Diet ID
More like this
Lens Analytics
Lens Analytics
Read with this
Mapping Out W2H Arm Events
Mapping Out W2H Arm Events
More like this