Enrollment Run-In Variable
What is an Enrollment Run-in variable?
An Enrollment Run-in variable is the same thing as the Enrollment Run-In Target Generator, but with extra perks! These two features allow you to calculate a goal for a participant based on their baseline run-in period data so that they can have a realistic and attainable goal.
By using the Enrollment Run-in variable, you can
- Allow participant's to choose their own goal based on how they did in the run-in period via the Goal Selection survey
- Calculate ramp up needed to ease into new goals. See Target Value Variable for setting up Ramp Up periods
- Notify participants about their baseline run-in average

![]() HOLD UP, WAIT A MINUTE: It's important to note that the Enrollment Run in variable cannot be used to create a target for a participant. Instead create a Study Arm Target and use the Target Value Variable.
HOLD UP, WAIT A MINUTE: It's important to note that the Enrollment Run in variable cannot be used to create a target for a participant. Instead create a Study Arm Target and use the Target Value Variable.
How do I set up an Enrollment Run-in variable?
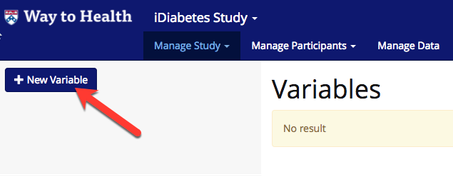
- Navigate to Manage Study --> Variables
- Click '+ New Variable'.
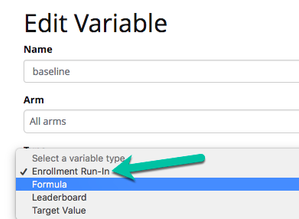
- Give the variable a friendly name.
 Tip! Choose something that you will remember when you are building the variable into event logic or participant messaging and incidents.
- Select the arm and type 'Enrollment Run-in'
- Tip! Usually the arm for Enrollment Run in variables is all arms
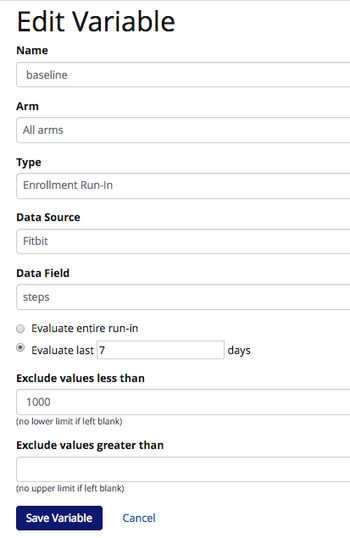
- Set up evaluation criteria and click 'Save variable'.
- Your new Enrollment Run-in variable will now display in the Variables overview page.

How do I use an Enrollment Run-in variable?
In Messaging:
- Navigate to Study Arms under Manage Study. Click 'Manage Event Schedule' for the arm that you want to add a message to the participant about their baseline value.
- Either create a new event or edit an existing event. You can include your new variable in messaging on event creation or in the logic screen.
- Not sure how to set up the {{ baseline x 20% }} variable? See Formula Variable for help.
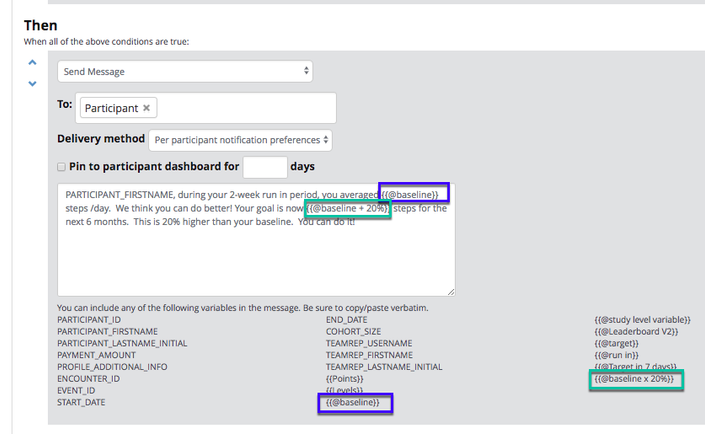
- Not sure how to set up the {{ baseline x 20% }} variable? See Formula Variable for help.
- When the participant receives this message, the variables will be replaced with their current target value and target value in 7 days.
- Click 'Save' Logic'
- WARNING If you change the name of your available after it has been added to a message or incident text box, it will NOT update, and you will need to manually update it. Therefore once you create your variables and add them into messaging, we recommend keeping the original name.
Allowing participants to choose their own goal:
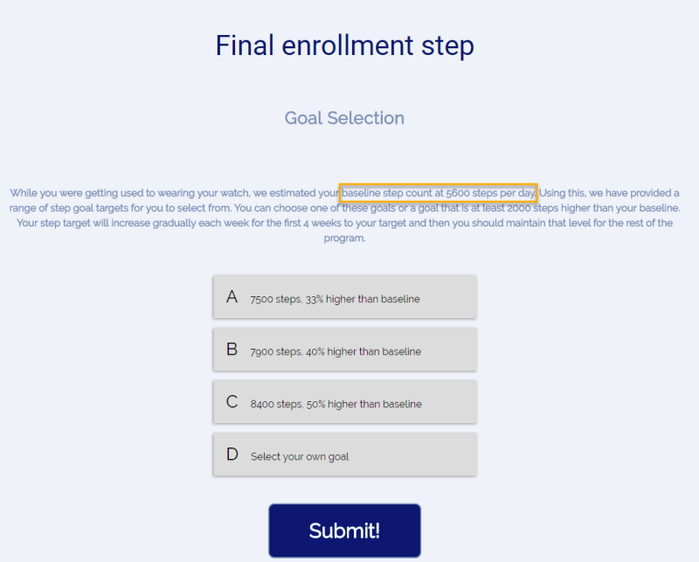
Imagine the following scenario: A participant completes a 2-week run in period and has an average step count for those 2 weeks, e.g. 8,000 steps. The participant is told their average and asked to pick a goal. The participant has an option to choose 33% higher than baseline or 40% higher than baseline.
In order to configure these in options in the Goal Selection Survey, the variables must be set up ahead of time.
- Create variables
- Baseline - this will be the variable that calculates the average step count during the 2-week run-in period. Instructions on how to build this are listed above.
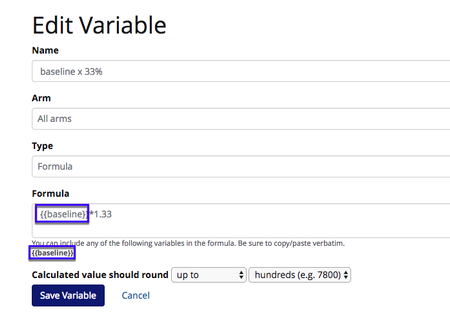
- Baseline x 33% - this is the Formula Variable that is going to multiply the Baseline step count by 1.33
- Leave 'All arms' as default and select 'Formula' as the variable type
- Set up the formula = {{ baseline}} * 1.33
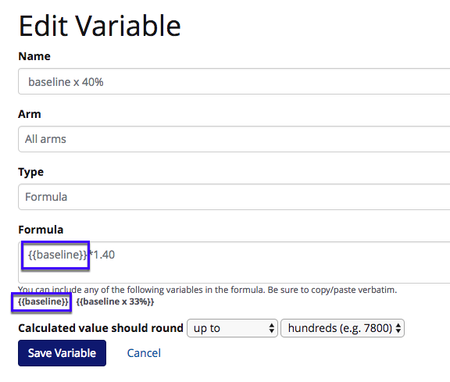
- Baseline x 40% - this is the Formula Variable that is going to multiply the Baseline step count by 1.40
- Leave 'All arms' as default and select 'Formula' as the variable type
- Set up the formula = {{ baseline }} * 1.40
- Repeat for additional goal options, e.g. Baseline x 50%
- Baseline - this will be the variable that calculates the average step count during the 2-week run-in period. Instructions on how to build this are listed above.
- Add Goal Selection Survey device
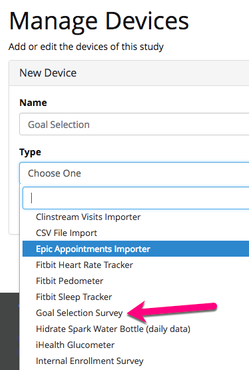
- Navigate to the Devices tab.
- Click '+ New Device' and select Goal Selection Survey.
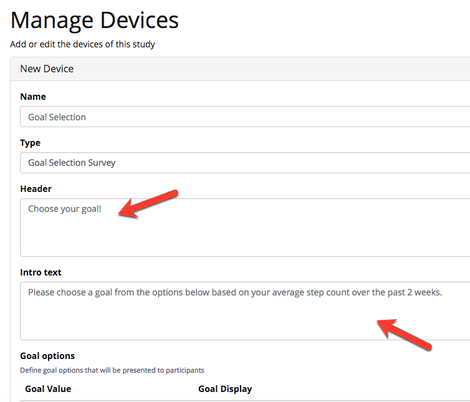
- Add Header, or the title, and Intro, where you can add any help text to display to participants as they are choosing a goal.
- Tip! Add the ((@baseline)) variable into the Intro text box to tell a participant what their average was during the run-in period.
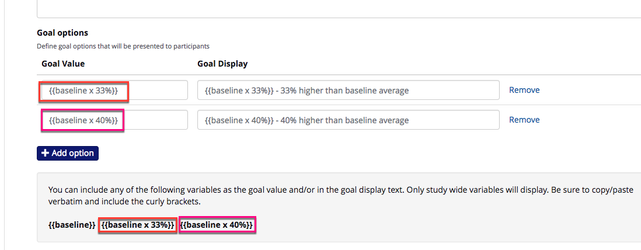
- Set up the Goal Options. You can use values, e.g. 10,000, or the variables that we created in Step 1.
- Goal Value = calculation of the value behind the scenes. You can also use a set value like 10,000 for steps or 0.5 for pounds
- Goal Display = explanatory text explaining the Goal Value and how it was calculated
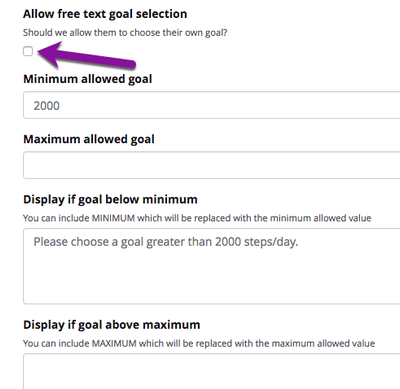
- Indicate if the participant also has the option to choose their own goal and set up any minimum or maximum values.
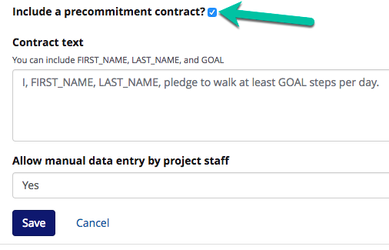
- Want participant's to sign a commitment contract? That can be done here, too!
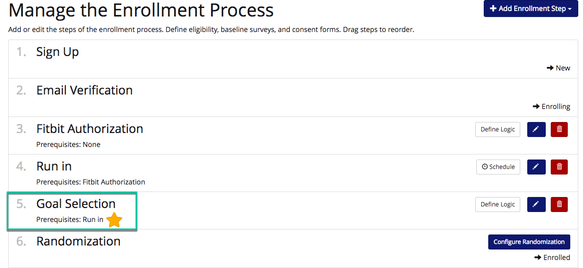
- Navigate to Enrollment under Manager Study.
- Add Goal Selection Survey as an Enrollment step by choosing 'Survey'. Goal selection should be added AFTER the baseline run-in period and the run-in should be a pre-req.
- Goal Selection Survey set up is complete! It will look like the following to participants,
- Navigate to the Devices tab.